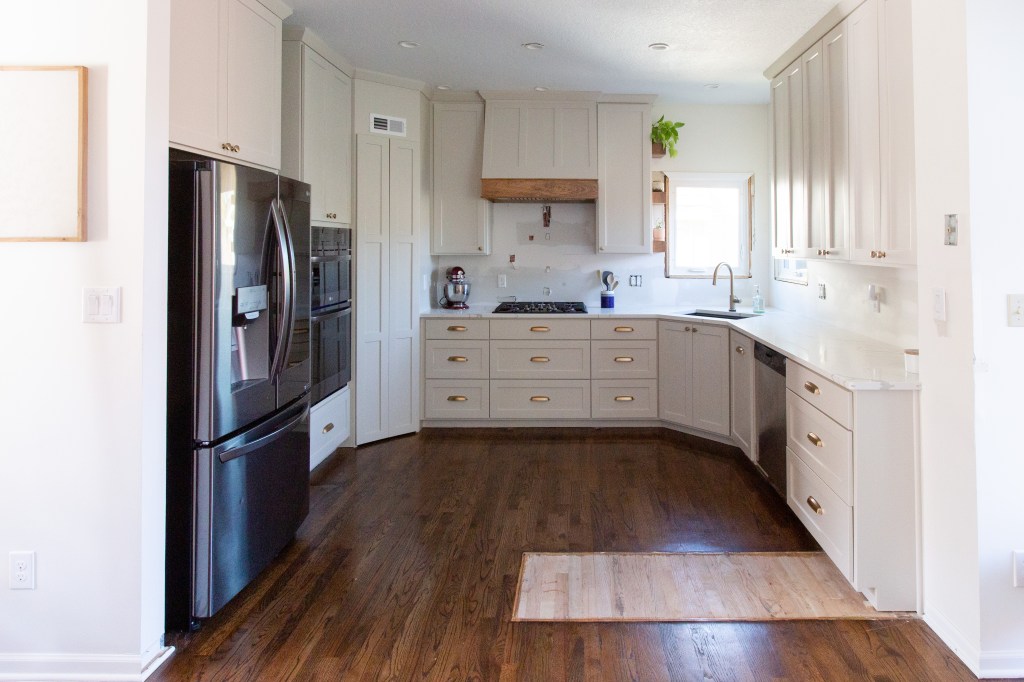
I’ve spent the last six weeks slowly painting our kitchen cabinets and now that the insanity is over (minus a few touch ups), I can finally just appreciate the beauty of what we’ve been working so hard on for months.
The cabinetry company that we hired to build and install the kitchen doesn’t provide painting, and when we got quotes from several local contractors to paint the kitchen cabinets, we decided that it was an area we were willing to do ourselves to cut cost. That’s how I found myself spending every nap time, every evening, and every free moment Grayson had at home to hang out with Florence (when he wasn’t working on his masters or working from home) prepping and painting the kitchen cabinets.
For everyone intimidated to paint their cabinets, repeat after me: it isn’t complicated, it’s just all consuming. 90% of painting cabinetry is about prep work – prep will make or break your final product, and man oh man, it’s a lot of work. It just isn’t complex work.
The steps I’ll outline below follow what I did to paint my raw wood cabinets. It would be a similar process to paint cabinets that already have a finish on them. I’m not a professional by any means, but I’m honestly thrilled with how the cabinets turned out. It’s starting to actually feel like a kitchen again!
THINGS TO CONSIDER
There are two ways to paint your cabinetry – spraying or rolling. Each have their pros and cons and you have to decide what’s right for you.
Spraying
| PRO | CON |
| Smoother finish | Expensive tools and materials |
| Less time spent painting | More prep time |
| Harder to fit sprayer into tight spaces | |
| Potential health hazards in small spaces | |
| More paint waste |
Painting by Hand
| PRO | CON |
| More flexibility | Finish isn’t as smooth |
| Ability to work in smaller sections and tighter areas | More laborious |
| Less prep | More time consuming |
| Less material waste |
Material considerations:
- The brush and roller you select are important. I like the extra smooth nylox brushes by Purdy for painting cabinetry, doors, trim. I also used the Whizz foam roller kit that’s specifically designed for painting doors, trim, and cabinetry. Both of these are designed to reduce your brush and roller marks, which is important for a smooth finish.
- The caulk you select is also important. You want a flexible, long lasting caulk that won’t crack after a year or two. I prefer the DAP brand, specifically the Alex Plus line. I always look for the 40 year label, because a professional cabinet painter once told me he swears by it. Its composition allows for more flexibility and an extended life span, and if it’s good enough for the pros, it’s good enough for me.
- Because we saved so much money by not hiring someone to paint the cabinets, we decided to upgrade our sprayer for this project. We bought a new sprayer secondhand and opted to go for a model I’ve been eyeing for a long time, the Graco Ultramax Airless Handheld Sprayer.
- The paint you select will ultimately decide what level of finish you can achieve. There are tons of paint options and lots of pros and cons to them all, but after lots of research and experimentation, my personal favorite is Benjamin Moore Advance. Without going too far down the rabbit hole of paint types (which could be its own entire article), there are two main types: latex (what you usually put on your walls) and oil/alkyd (what has traditionally been put on pieces that require durability and a smooth finish, like cabinets and handrails). Traditional oil paints take far longer to cure than latex paints, require chemicals to clean your equipment, and have higher levels of volatile organic compounds (VOCs), which means they’re more toxic, but their finish is much smoother and more durable. Advance takes the best of both worlds – it’s water based, so the level of VOCs is lower than oil paint, it doesn’t require chemicals to clean your equipment, and it can completely cure in 5-7 days depending on temperature and environmental factors, plus it has a super smooth and durable finish, even when applied with a brush and roller. It’s pricier than the latex paint you’d buy for your walls, but the quality is worth the extra money. I also love that you don’t have to put on a top coat, because this is already a very labor intensive project without any extra steps!
My Materials List (with links)
- Wood filler
- Plastic putty knife to apply wood filler
- 120 grit sanding block
- 180 or 220 grit sanding block
- Cotton rags
- Tack cloths
- Vinyl or latex gloves (tack cloths are sticky and leave your hands covered in residue, so this is personal preference)
- Painters tape
- Paint tripods
- Polycrylic
- Brush to apply polycrylic
- Drop cloth
- Paint can opener
- Stir sticks
- Extra soft brush
- Foam roller
- Primer – either Zinsser Bulls Eye 1-2-3 or KILZ 2
- Caulk
- Caulk gun
- Paper towels
- An old tupperware container for water
- Brush cleaning tool
STEP 1: PREP THE RAW WOOD
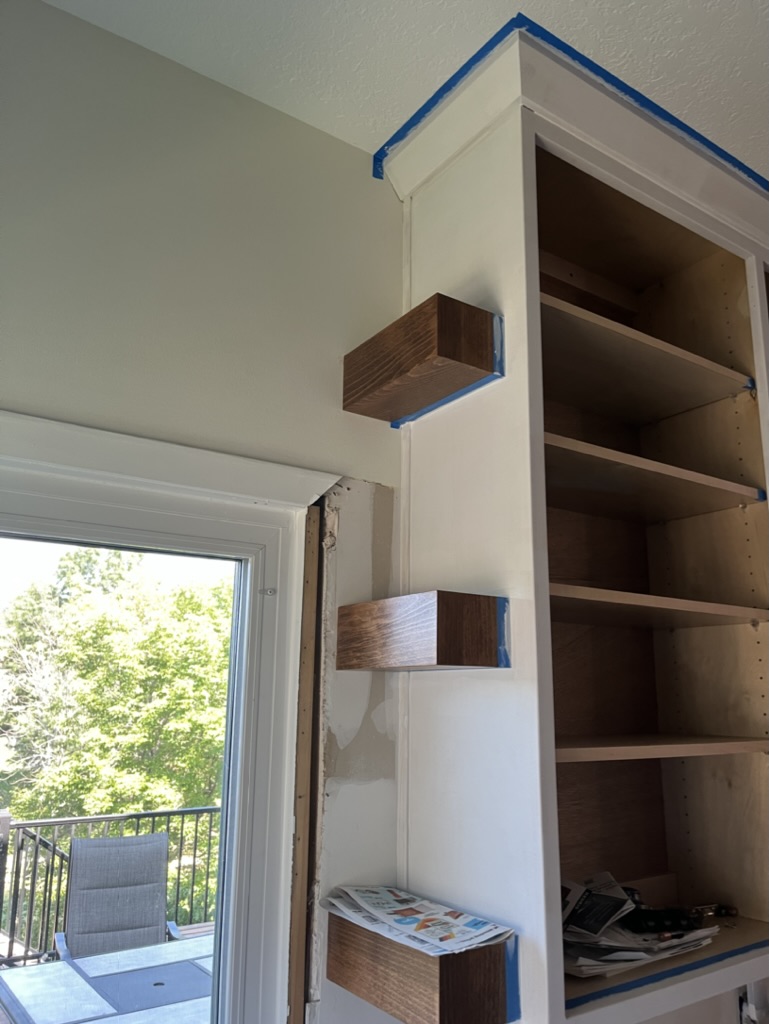
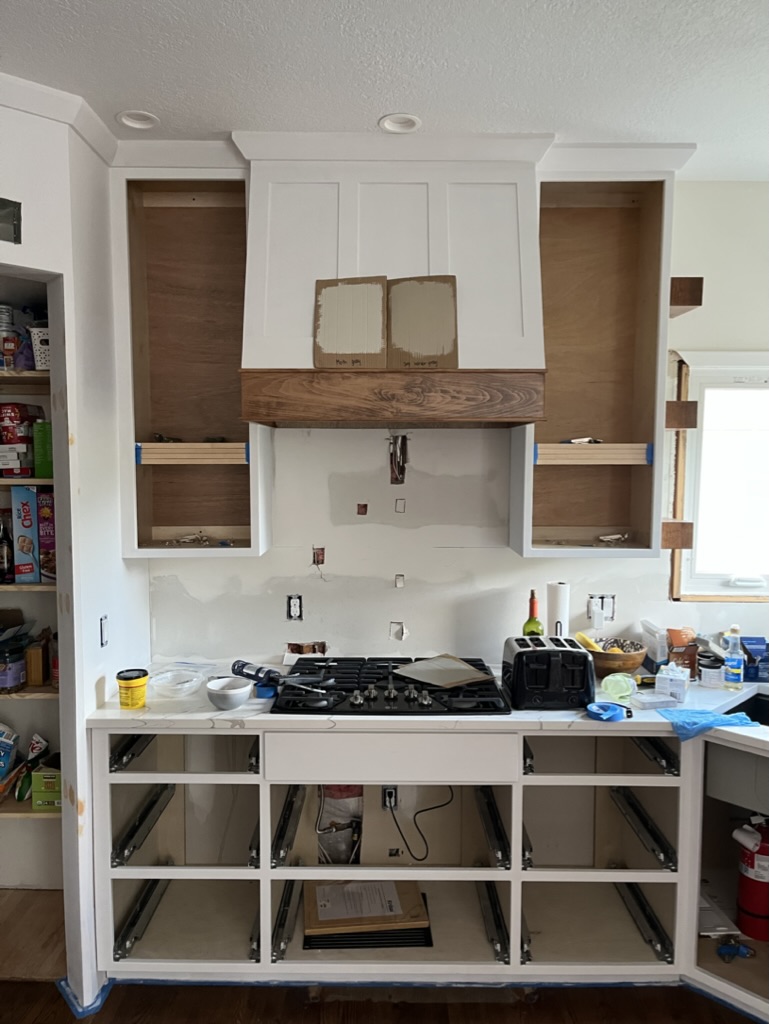
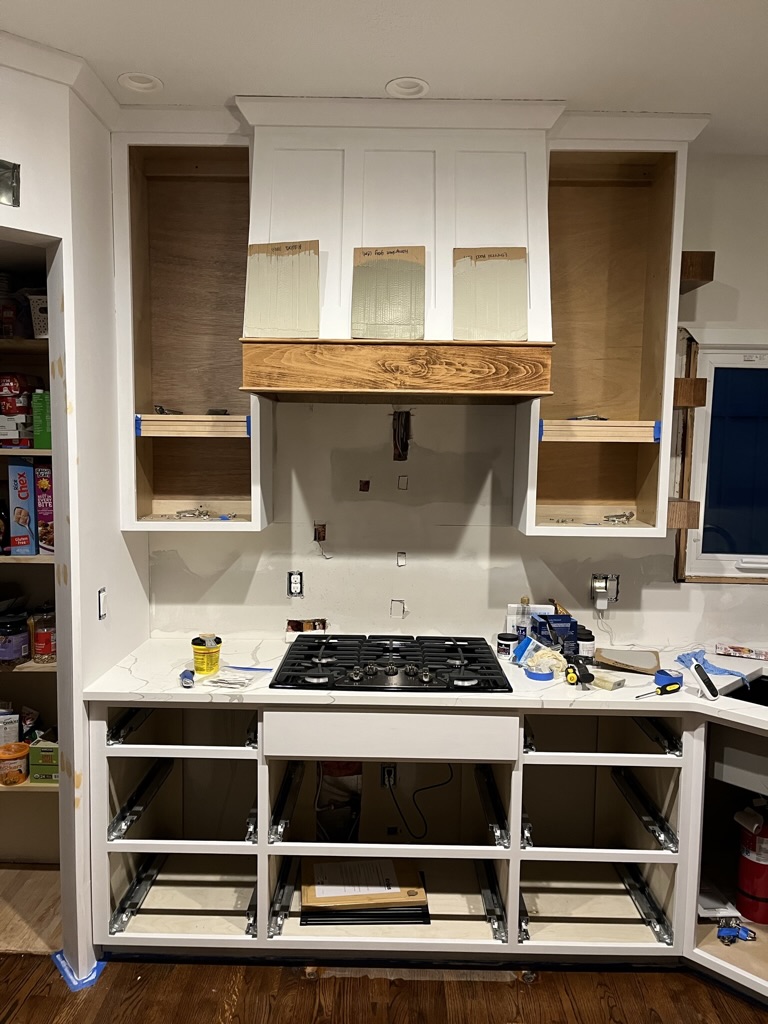
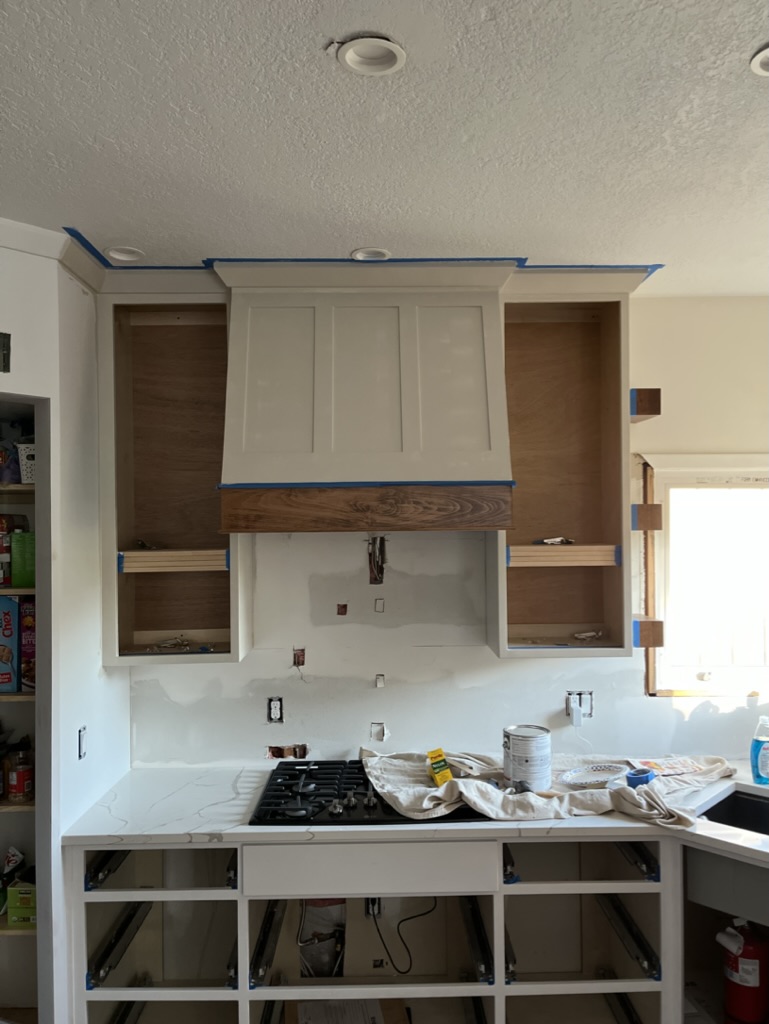
Our cabinet installers left a few spots where there were noticeable gaps between cabinet boxes and between cabinet boxes and walls, so we chose to add some small wood filler strips to cover those areas. I cut them to length and then tacked them up with some 1″ nails.
I then filled the holes and dents in the wood throughout the kitchen with wood filler. Since we were painting our cabinets, I knew this wouldn’t be noticeable once it was all finished. I let the woodfiller dry overnight, then put a second coat on any defects that were still visible or were originally quite deep. After letting it dry overnight once more, I sanded these spots with a 120 grit sanding block and then a 180 grit sanding block.
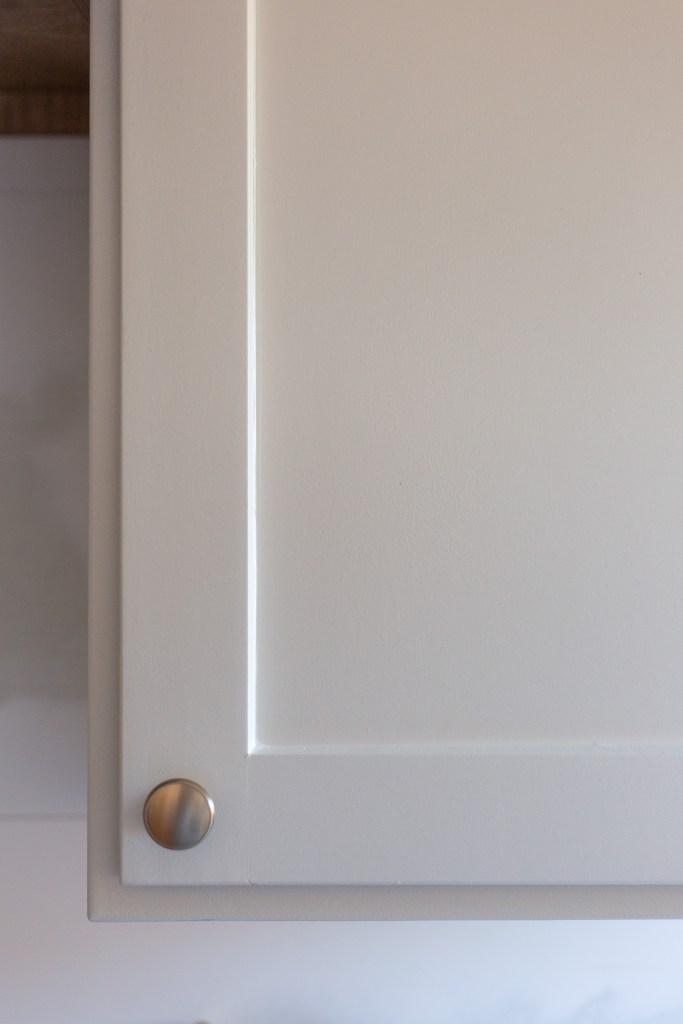
I wanted a super smooth finish on my cabinets, so I lightly sanded every visible surface with a 180 grit sanding block. Then I wiped everything down with a damp cotton rag, and once that dried I went over it again with a tack cloth to get the remaining dust.
STEP 2: SEAL THE INSIDES OF THE CABINET AND DRAWER BOXES
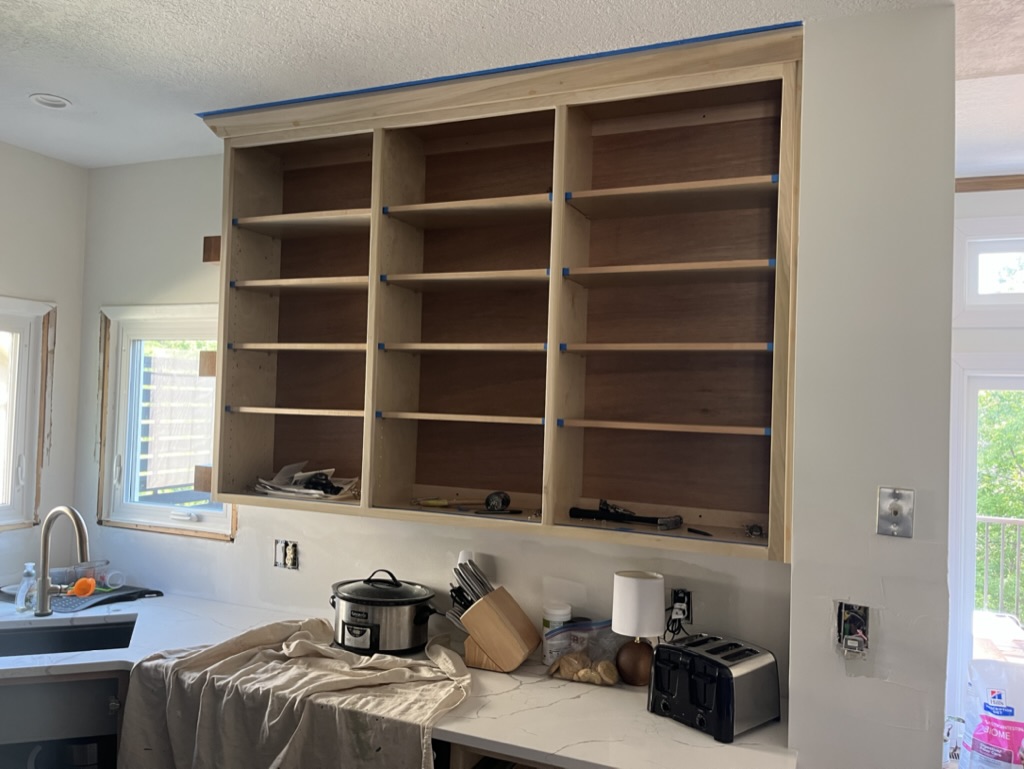
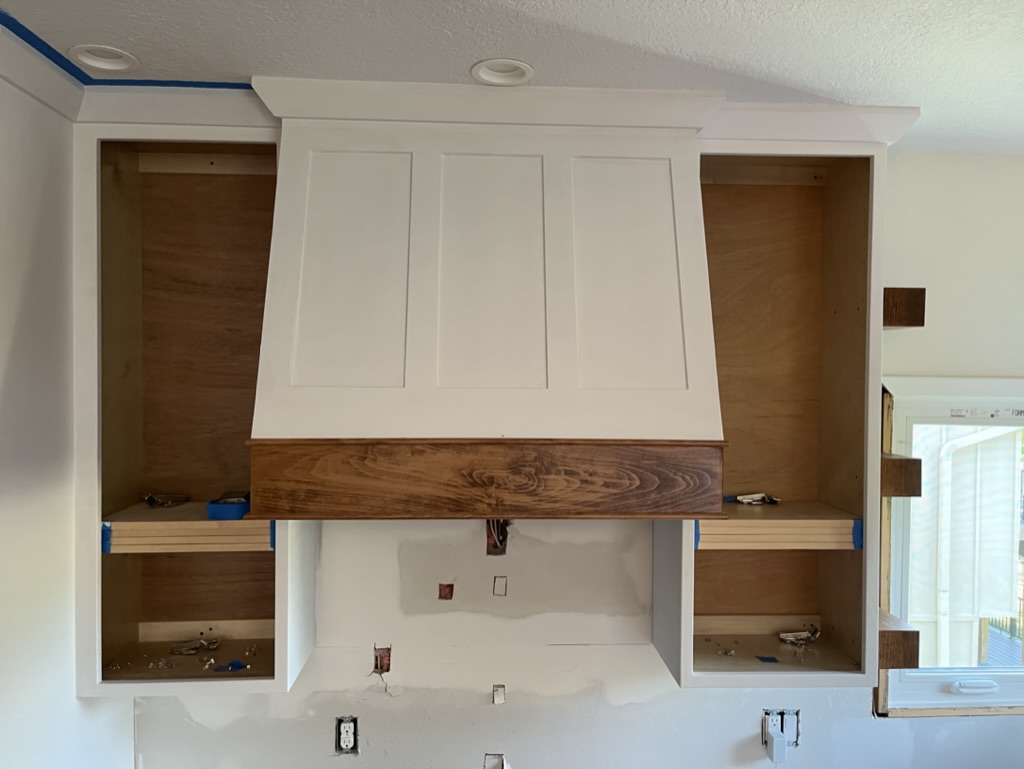
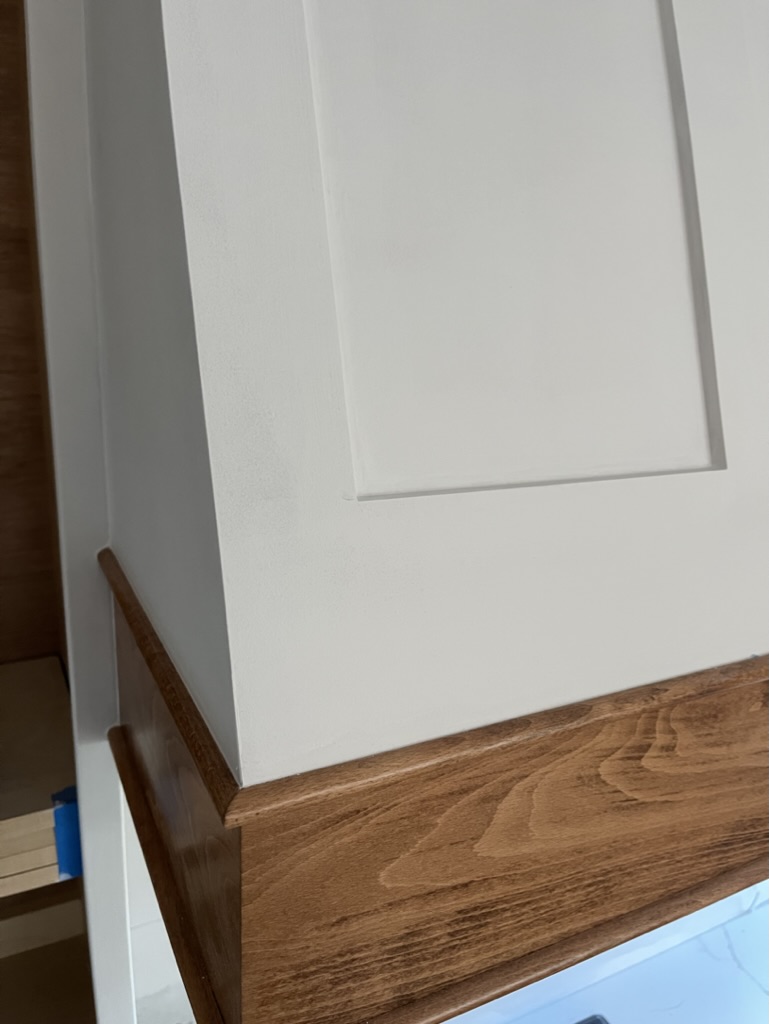
I knew I wanted the raw wood to show inside the cabinet boxes, so I chose to use Minwax Polycrylic to seal and protect the wood. There are loads of options when it comes to clear coat, but I chose polycrylic because it isn’t as toxic as some of the others, is affordable, and doesn’t tint the wood (some finishes can make your wood look yellow). It isn’t as hardy as polyurethane, but for me the trade offs were worth it; I can always touch it up down the line if need be.
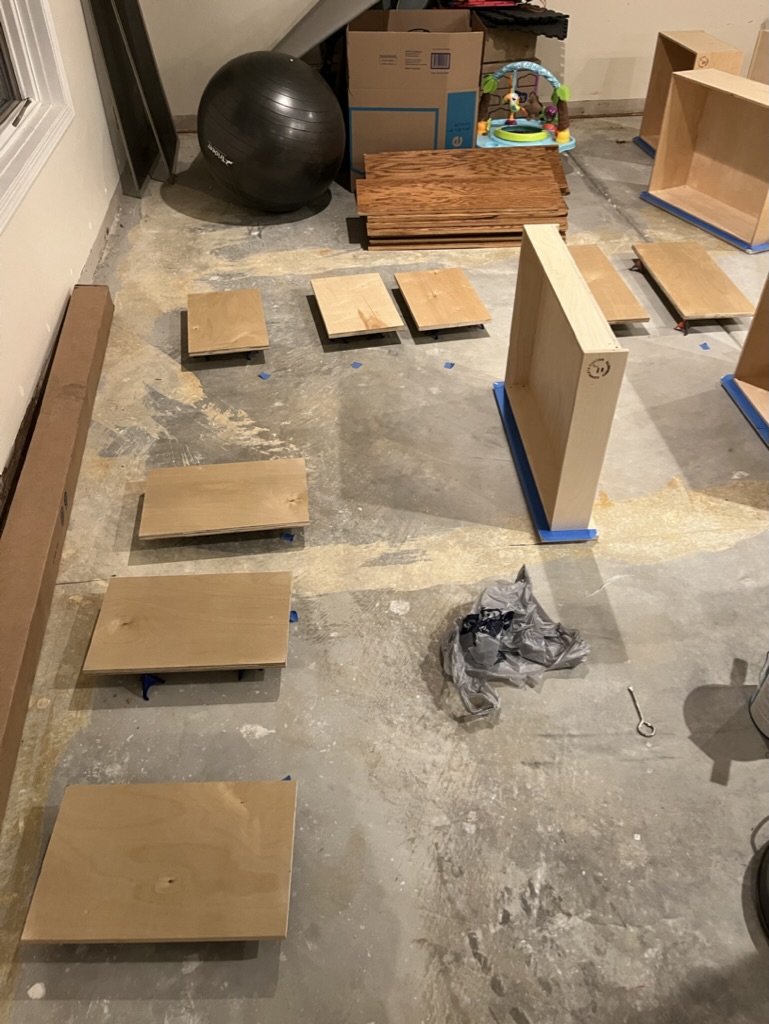
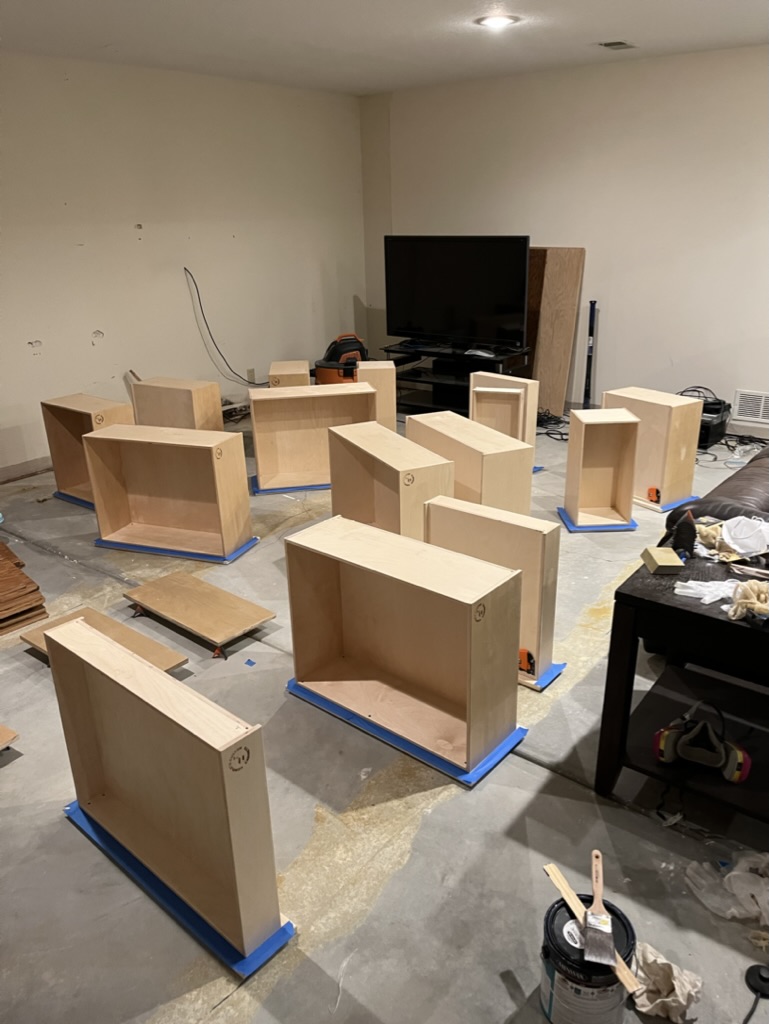
I labeled and removed the shelves and drawers (hint, label your shelves and drawers by writing on painters tape so you can remove it and place it on the ground next to the shelf or drawers when you go to clear coat) and brought the shelves and drawers into our basement since it’s currently unfinished. I set the shelves on painter tripods to keep them elevated off the ground and placed the drawer boxes on their fronts so I could brush every other side of the boxes. I then taped off the inside of the cabinet boxes, and brushed on the poly. The shelves and drawers were also sanded and wiped prior to applying the polycrylic.
After letting the poly dry overnight, I lightly sanded every surface I had coated using a 180 grit sanding block. The first coat of poly raised the grain of the wood, so it left it feeling really rough and bumpy. I wiped everything with a damp cloth again, then a tack cloth, and then applied a second coat of polycrylic to everything.
STEP 3: PRIME
When I was working on this, the Zinsser Bullseye 1-2-3 primer that I usually prefer was ungodly expensive for some reason, so I followed the recommendation of the cabinet painter I had met and opted to use Kilz 2 primer. I’m satisfied with the finish, but I still prefer the 1-2-3 and would probably use that in the future now that the price has come down to a reasonable cost again.
I originally planned to spray the cabinet boxes, but several factors made me change my mind. Some of the nooks and crannies, like the coffee bar area, were just too small to fit a sprayer into. I wanted the flexibility of working during nap time and just being able to pack up whenever my daughter woke up from her nap, instead of having to clean the sprayer right away, plus I wanted the ability to work in small sections so it all felt a bit more manageable. The prep work that would have been involved with spraying felt overwhelming (although when spraying the prep work takes ages and the actual spraying takes mere minutes, so it’s likely the same amount of time and work in the end). Plus I was nervous about the health implications involved in spraying paint in such an enclosed space, even with a respirator and a paint suit. I ultimately opted to brush and roll the primer and the paint onto the boxes and the drawers.
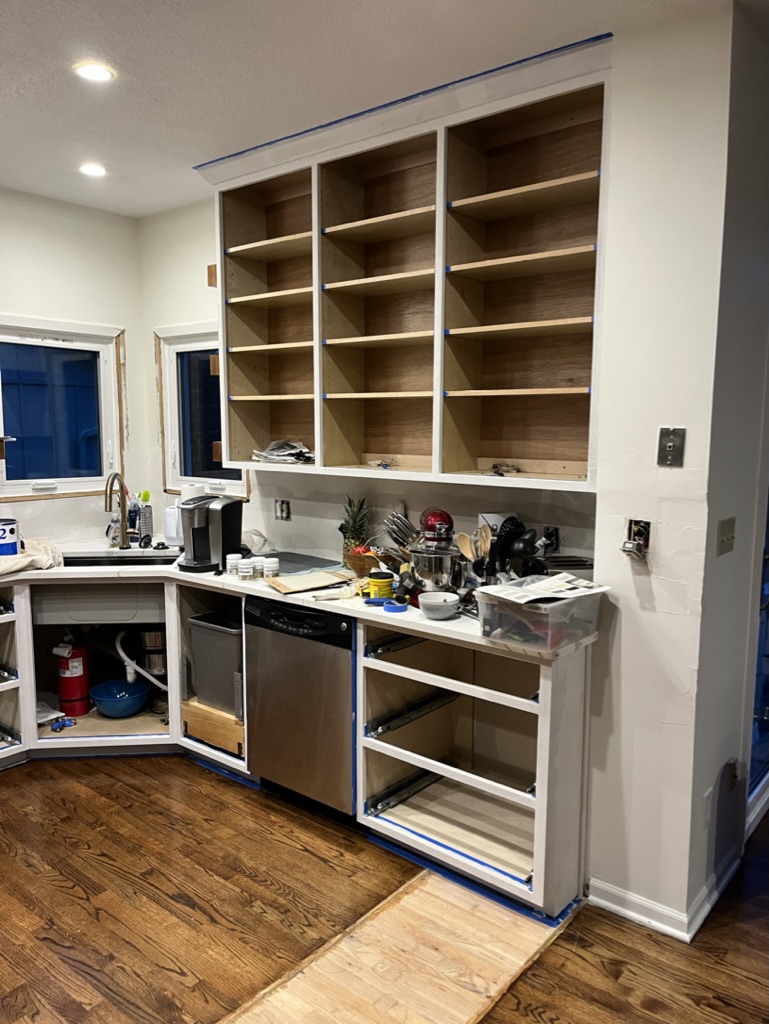
Although I had just wiped down the cabinet boxes with the damp rag and the tack cloth a few days ago, I knew they had gotten dust and residue on them, so I wiped them again. I know it sounds anal, but these are all really crucial parts to getting the smoothest finish possible. Missing one stray hair or piece of dirt because you didn’t want to wipe the cabinets again means you’ll be looking at that debris in your paint for the life of your paint. Then I taped off all the areas I didn’t want primer on, like where the clear coated interior of the boxes met the frame of the cabinet that I planned to paint. Meanwhile I also primed the front of the drawer boxes that were still in the basement.

Just like the polycrylic, primer has a tendency to raise the grain of the wood on the first coat, so after letting it dry fully, I sanded with a 180 grit block, wiped with a damp cotton rag, and wiped with a tack cloth again, then applied a second layer of primer. I left my tape on between coats of primer, and pulled it off before the second coat of primer dried.


STEP 4: CAULK
Once the primer was all dry, I sanded yet again with the 180 grit sanding blocks. This step was probably overkill, but I would rather do extra work now than regret not getting the smoothest finish possible down the line. Then I wiped down the sanded areas with a damp rag.
Next it was time to apply the caulk. Although I already knew there were gaps that needed to be caulked, the primer made those gaps even more apparent, so it was easy to see where I needed to ensure I applied the caulk. Caulking after priming also allows for better adhesion of the caulk (in my experience).
Caulk is meant for any surfaces that form a corner, like where a wall and a cabinet meet or the corners of the inside of the face frames. It’s like an insurance policy that lets you cover any gaps or imperfections so it all looks and feels like one continuous piece. To get a clean line, I taped off the areas I was going to caulk (for example, I placed tape on the ceiling when caulking the crown moulding). Then I spread a thin line of caulk on the area, dipped my finger in some water (that’s where the old tupperware container comes in handy), smoothed the caulk, then wiped the excess off my hand onto a paper towel or an old rag. Caulk isn’t meant to be sanded smooth, so it has to be smoothed while wet. However, you want to make sure your finger isn’t dripping wet when you go to smooth the caulk, as this added water can cause it to crack once it dries.
As soon as I was done applying it in each section, I removed the tape; if you let the caulk dry over the tape, you’ll have tape permanently affixed to your wall, unless you remove all the caulking and start over or cut the tape out with a knife.
I caulked all areas that would be painted on the cabinet boxes, along with the inset panels on the drawer fronts and the space where the drawer fronts met the cabinet boxes.
STEP 5: EXAMINE FOR BLEMISHES
This was my last chance to look for any defects and fix them. It is much easier to fix blemishes now, rather than after the paint is on, otherwise you’ll be attempting to blend in the paint and it’ll most likely be noticeable. Time for one final wipe with a tack cloth before PAINT!
STEP 6: PAINT
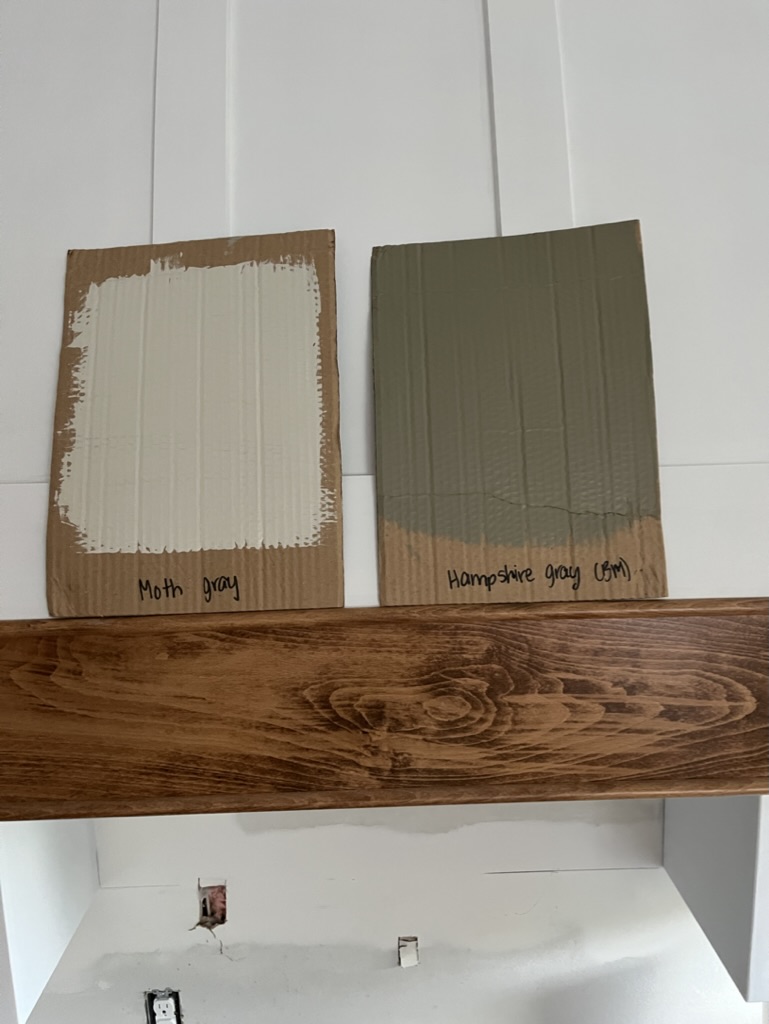
First I had to pick a color, and my analysis paralysis drove just about everyone in my life crazy. I ended up narrowing it down to just a few (don’t as how many I started with) and painted some swatches on some cardboard I had lying around. This way I could move it around the kitchen to see it from different angles and at different times of the day.


Paint! I used Benjamin Moore Advance in Satin. I like its leveling properties and how hardy it is without needing a top coat or a very long cure time – the label says final cure time is only 5-7 days. (see above for my discussion on why I chose this paint).
I worked in small sections to paint the cabinet boxes, making sure to tape off any spots I didn’t want paint on. This part was relatively simple, just tedious. Using my extra soft nylox brush, I brushed the paint onto the edges and small nooks and crannies and then back rolled everything I could using the foam roller and rolled paint onto all the larger areas. Once that dried for a minimum of 16 hours, I wiped it all down again with the tack cloth and repeated the process, then promptly removed the tape.
Painting the Cabinet Doors

Since I could move the doors outside to be painted and it only involved a minimal amount of taping (of the portions of hardware that couldn’t be removed and the indentations where the hinges sat), I decided to spray them. The steps for this were pretty similar to the steps I took on the other sections I had painted. I removed the hardware, labeled the doors on the insets where the hinges usually sat, taped off the sections I didn’t want paint on, and did a light sand. After wiping the doors, I primed them following the same process listed above, only this time with a sprayer, and then painted them. The best part of the process was the GIGANTIC tarp Grayson bought off an auction site we frequent. In this photo the tarp is folded and only a third of it is showing!
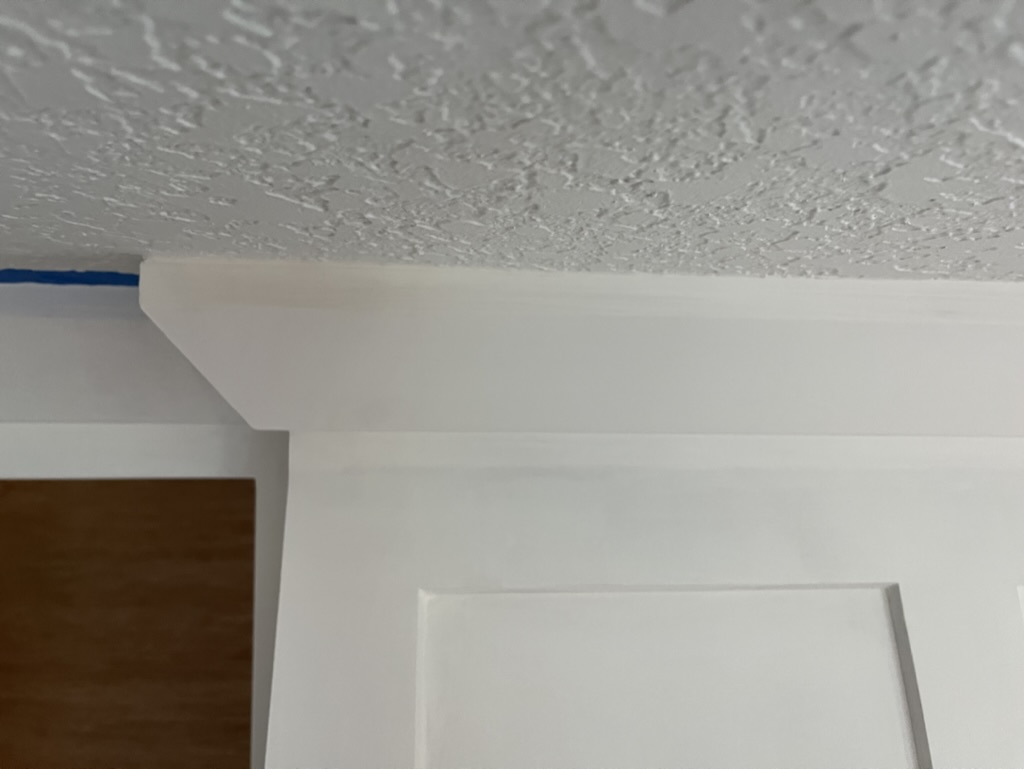
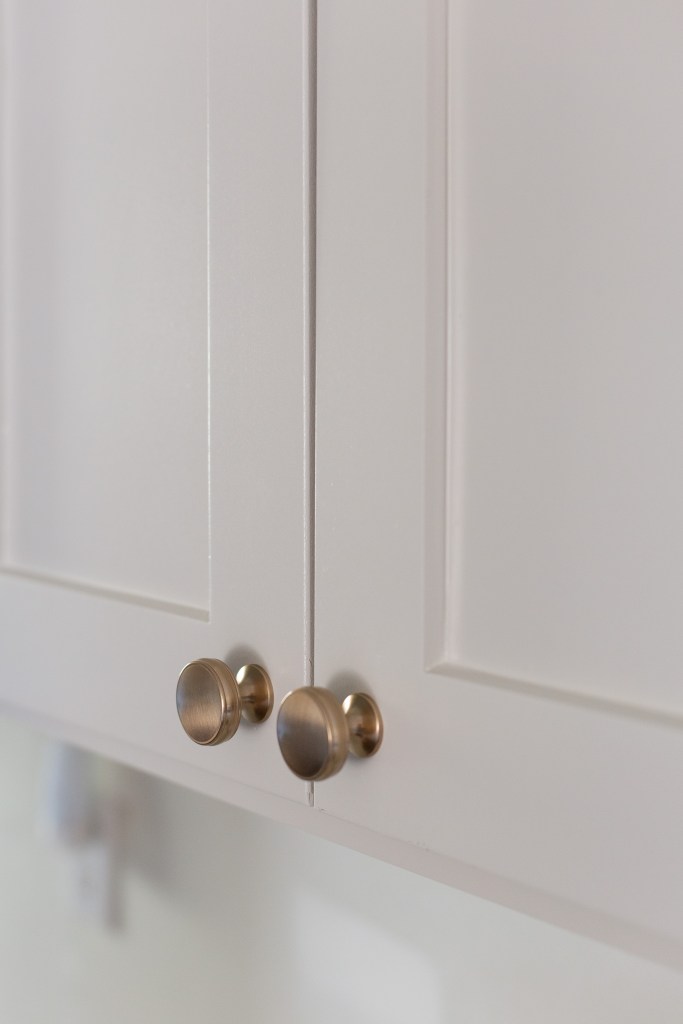
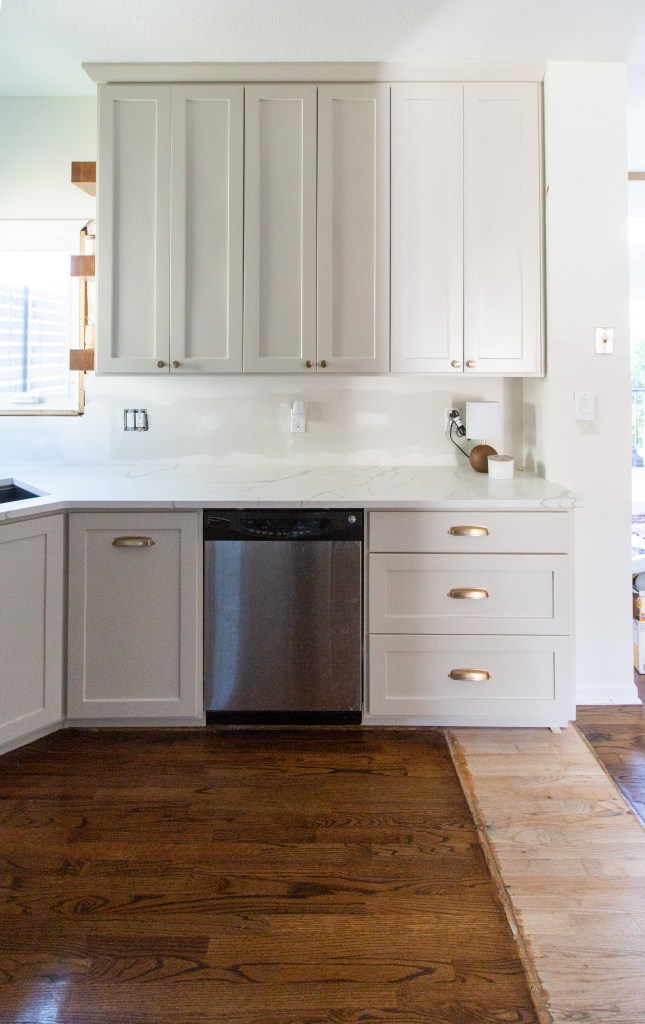
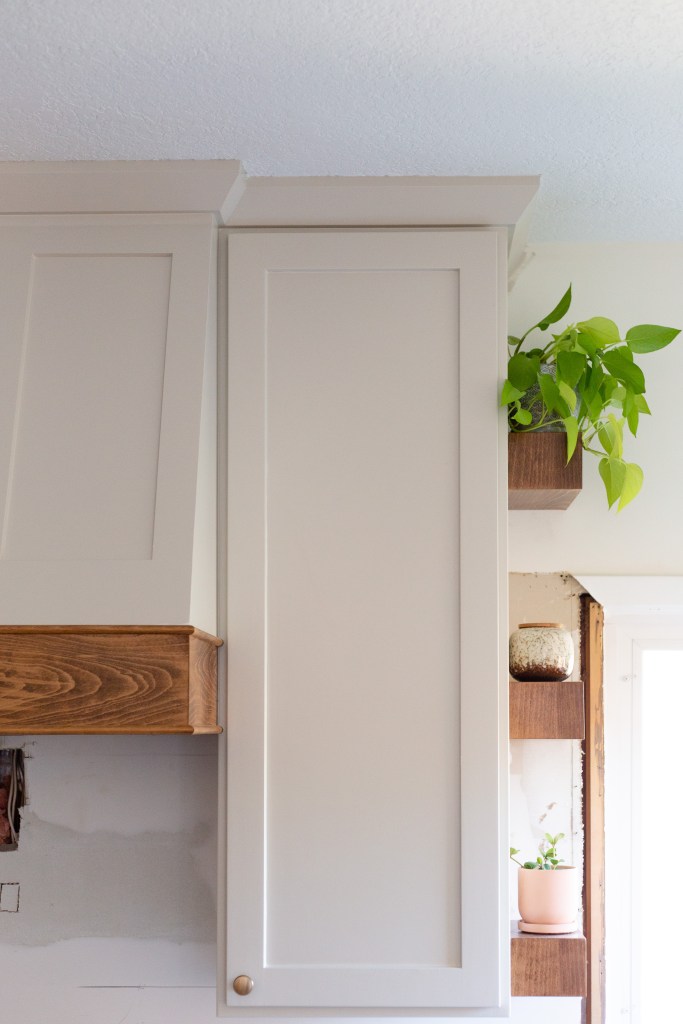
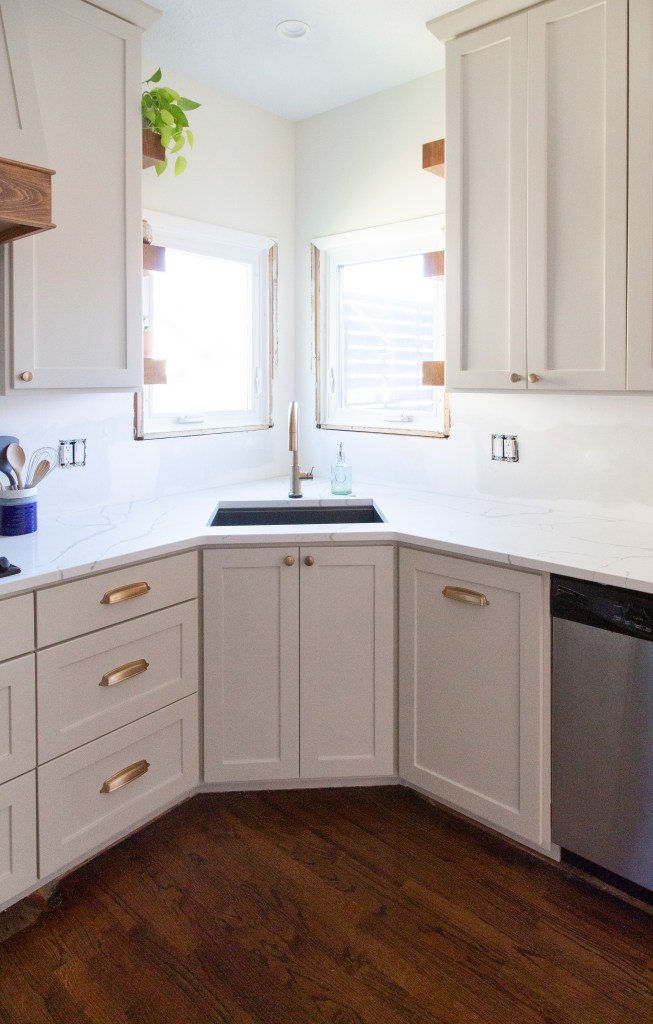
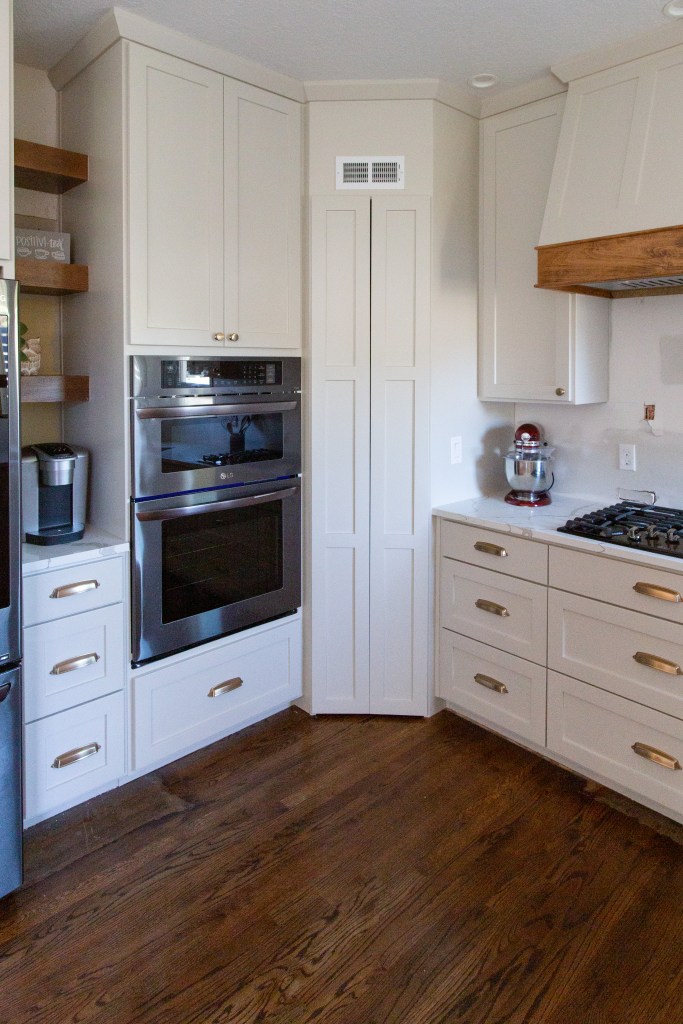
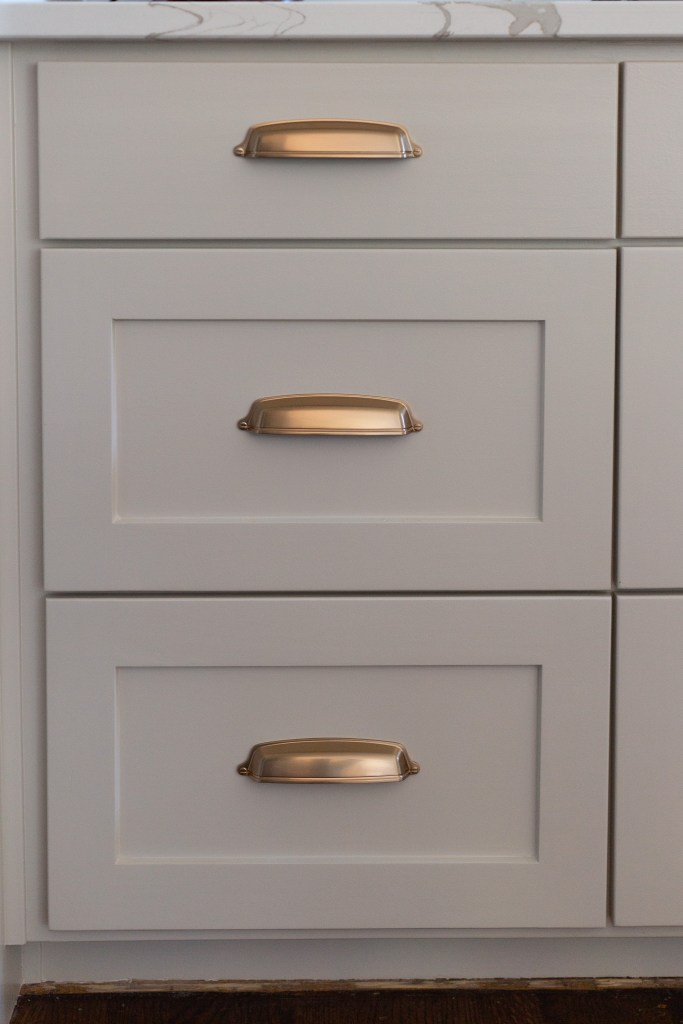
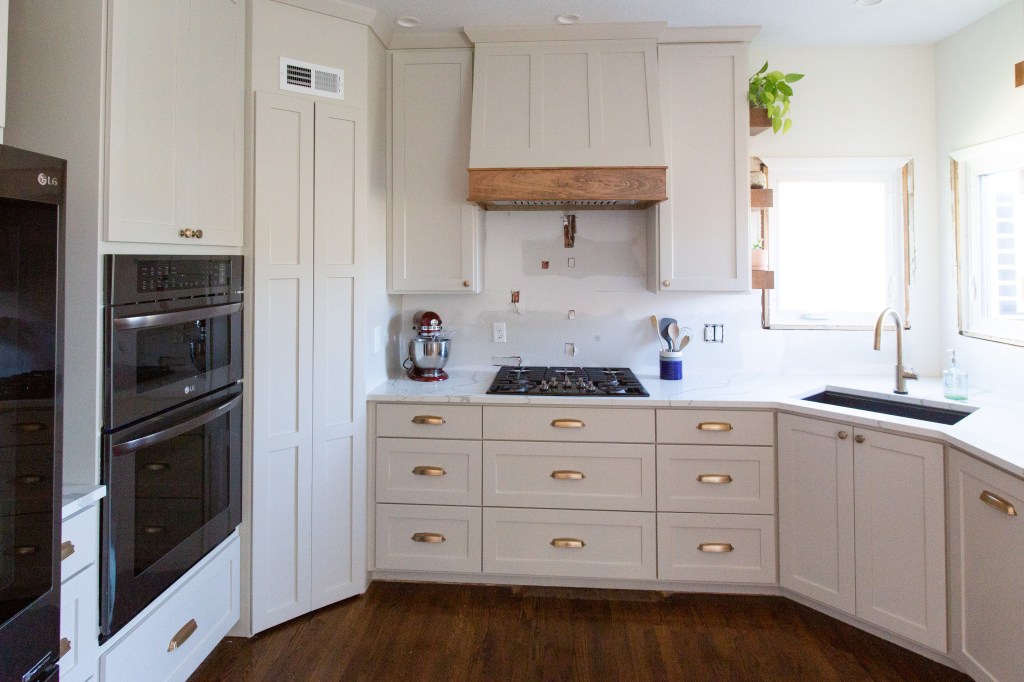
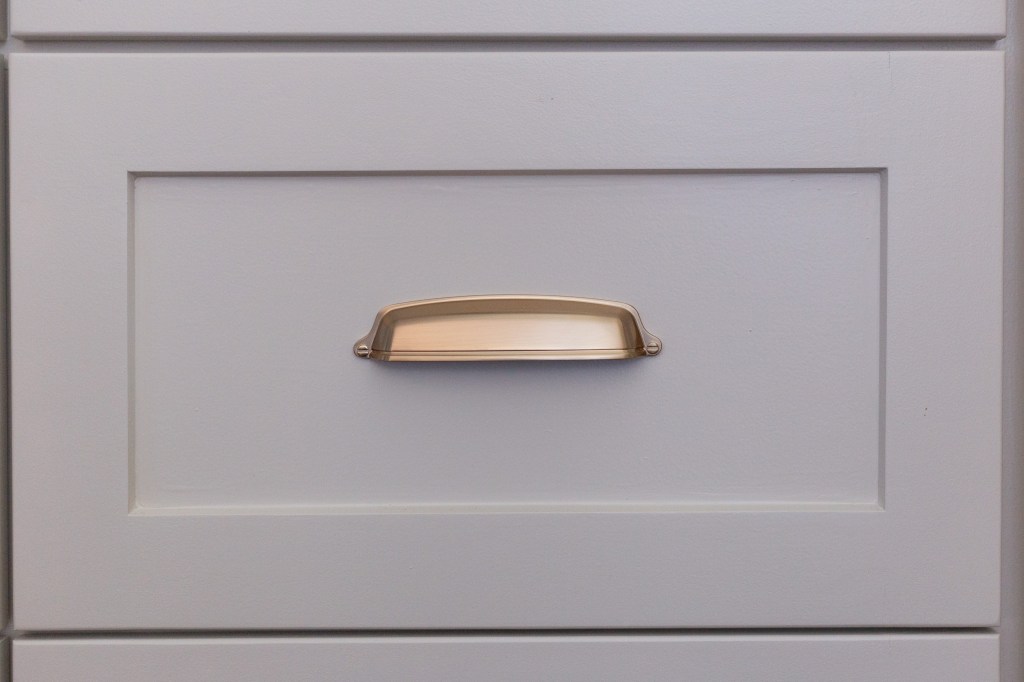
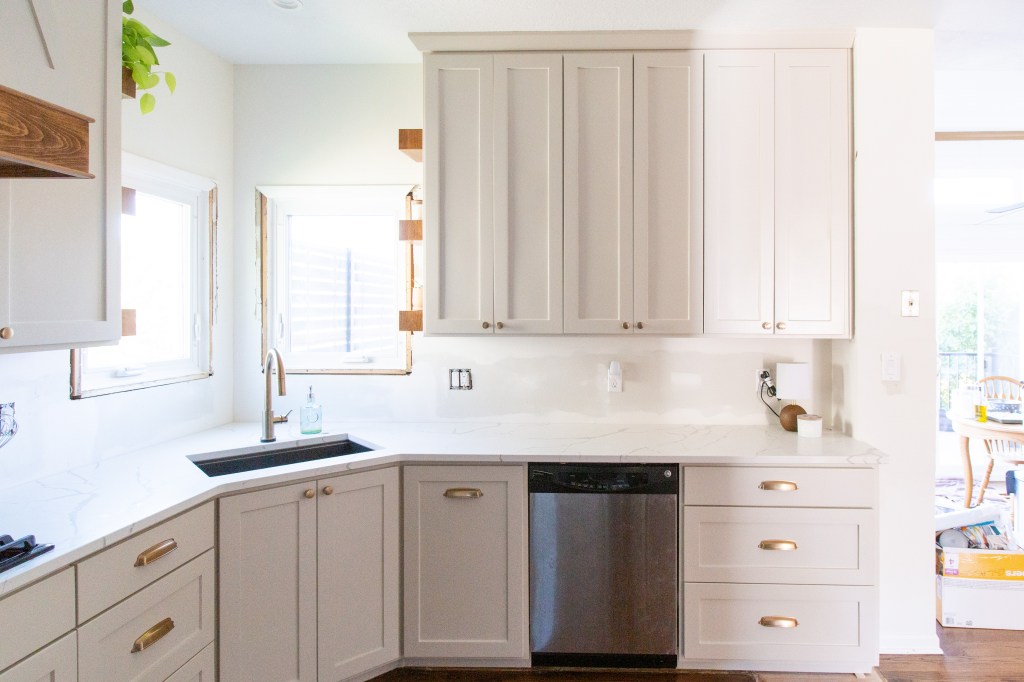
THE FINISHED PRODUCT!


One response to “Painting Kitchen Cabinets”
This is truly awesome. A variety of colors works here. I believe you did your best, and it shows.
LikeLike