

I always used to turn to DIY when I was feeling down, and I don’t know how I forgot that, considering my entire line of work now is one form of do-it-yourself project or another. Maybe that’s why. Maybe I lost the joy of creating in the monotony of the mundane. This week I gave myself a much needed reality and sanity check, however, and started to carve out a bit of time to do something I’ve been itching to do for a while – build some shelves for over the sink. Hopefully I’ll keep up with creating some much needed me time in a schedule that just keeps getting more and more saturated, because DANG this was fun and the benefits of these shelves are honestly so multi-faceted. I’ve spent time calculating, measuring and cutting, sanding and staining away the stress I’ve been feeling, and I now have some pretty sweet shelves to show off some cute decor and clear up my limited counter space.
In character with my now seemingly ever-present self doubt, I debated for a while on what style of shelving to install. Should I go modern or classic? Farmhouse rustic or industrial chic? All I knew going into it was I wanted to build the shelves myself (and needed a pretty easy plan since I’m a beginner and I have limited space and time to build at the moment) and that they would need to appeal to lots of people and stand the test of time, because they were going to become a permanent fixture in the unit, remaining behind when we move out. I ended up deciding on some classic floating shelves that hopefully won’t go out of style too soon.
So where does a beginner turn when they have a creative fire burning in them but very limited practical skill? Ana White, of course! I’ve been itching to try some of her plans for a while, but until I have some empty space in a garage that doesn’t share a wall with a tenant (sorry for the noise, neighbors!) or maybe even my own workshop (insert drooling/heart eye emojis here), I knew I had to start small. Thus, the decision to use her tutorial and plans for THE BEST Floating Shelves: https://www.ana-white.com/woodworking-projects/best-floating-shelves
Guys, she wasn’t kidding. These shelves are pretty simple for a beginner with limited tools at her disposal. I’ll give you a quick overview of my build, but make sure you go check out her page for the actual plans and demo!
First things first, I had to decide how many shelves I wanted and how to space them, so I turned to my trusty tape to visualize different ideas in the space.
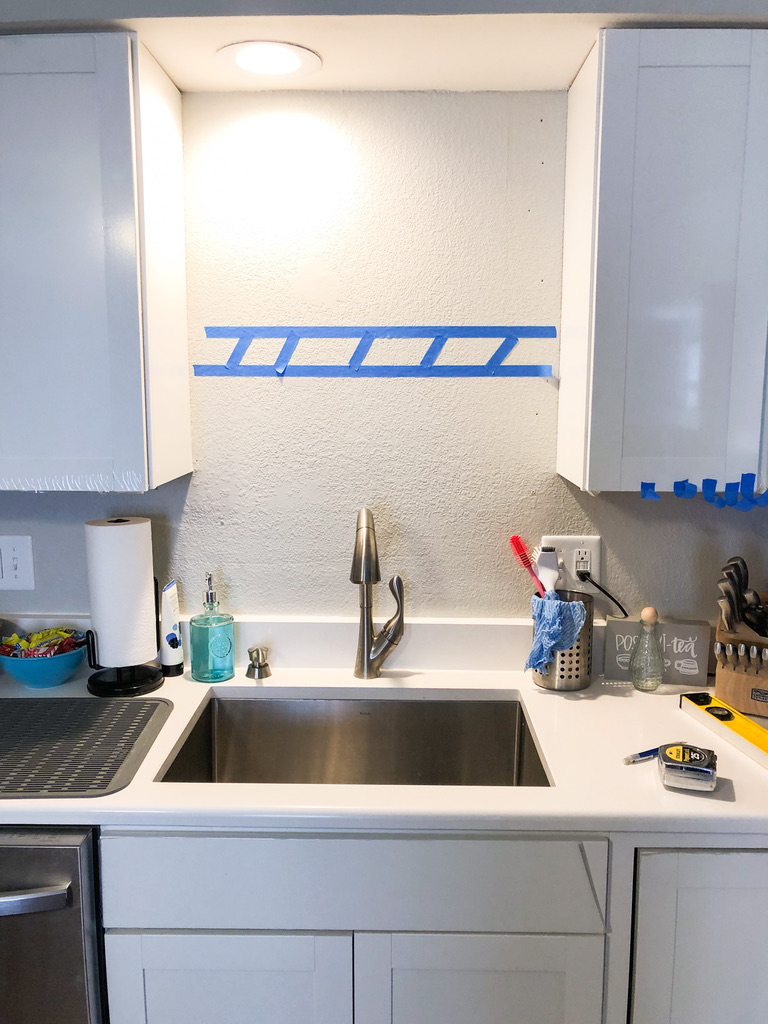


The clear winner for me? Two shelves!
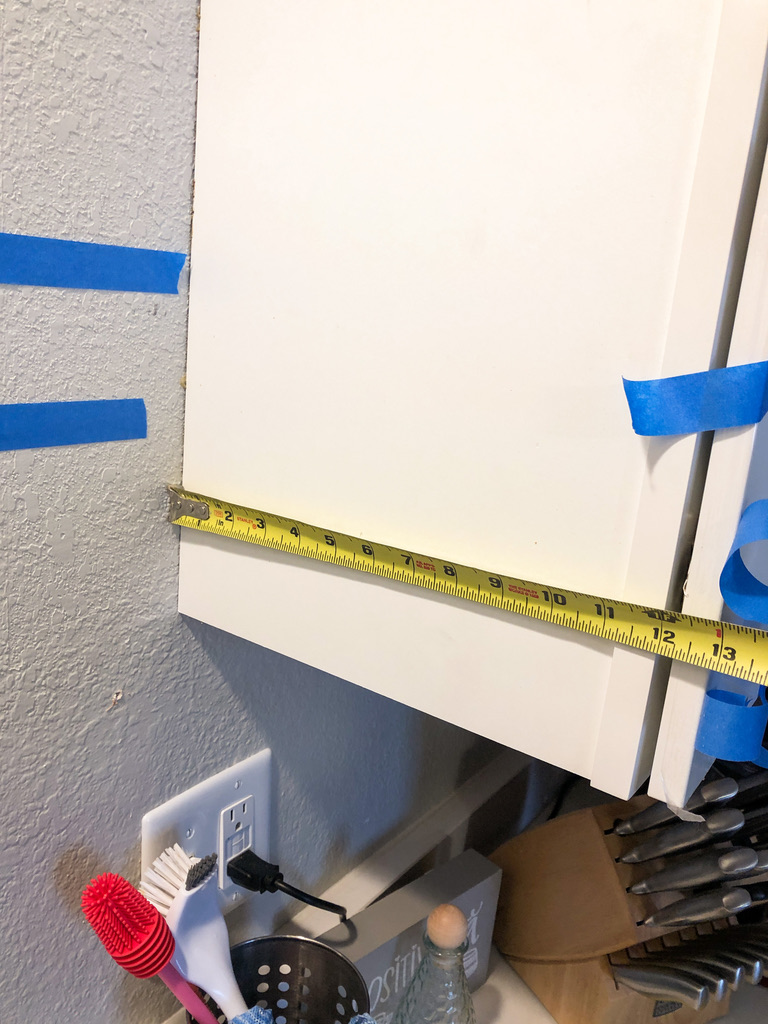
Next step? Take some measurements and plan out the space! I knew I wanted the shelves to span the width of the opening for a somewhat seamless look, but I also didn’t want to block the light from above or have them extend too far over the sink. I ended up deciding to make two shelves of varying widths – the lower shelf would be six inches deep, while the higher would only be four. Thanks to my husband and some of you guys for the awesome idea!
Then it was time to do some quick math and run to the store for supplies, break out the saw, and get to work.
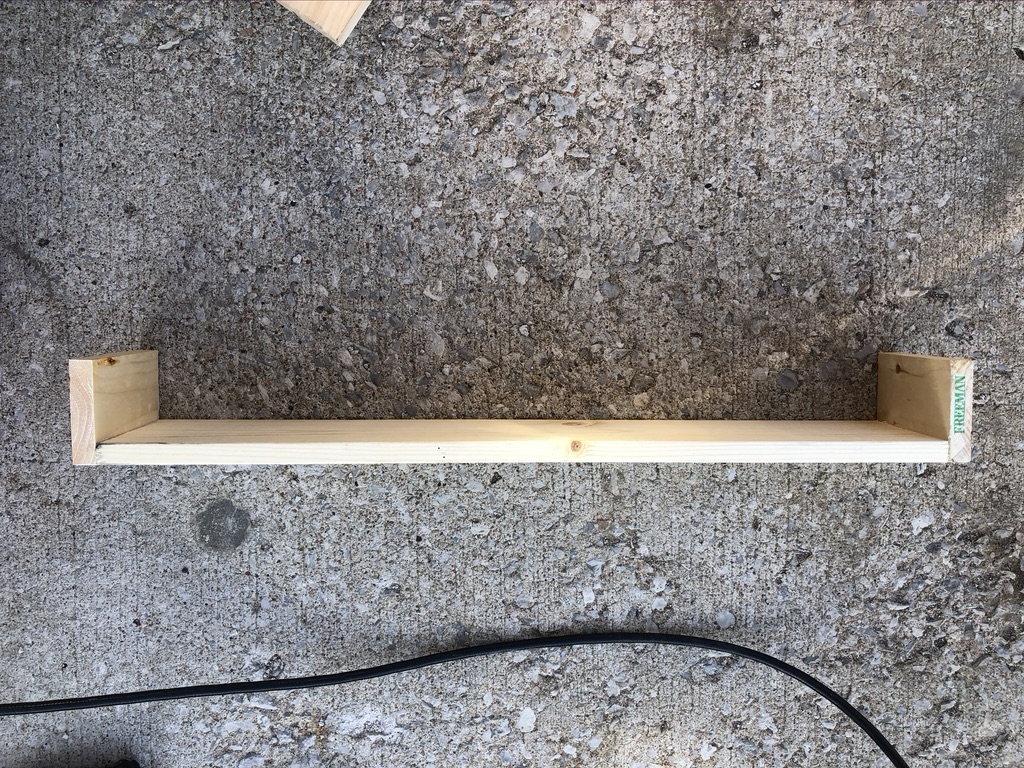
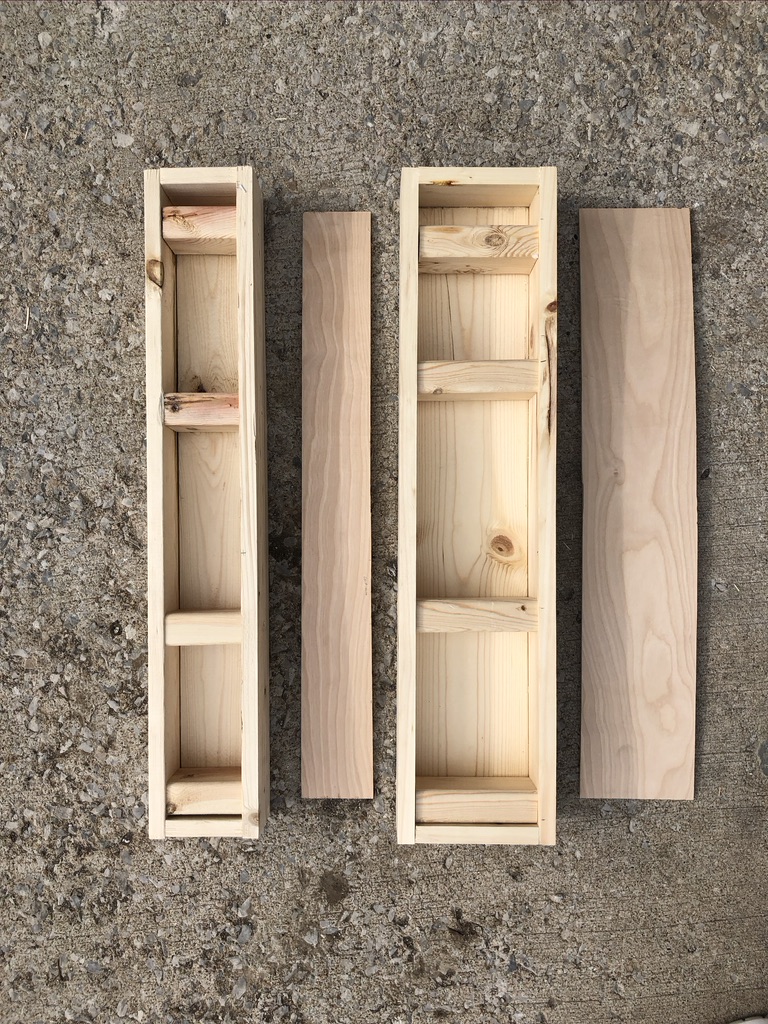
Following Ana’s directions, I cut a board the length of opening between the cabinets (creating the top of the shelf) and then started to create a frame by adding two pieces of wood for the sides. Since these would be visible, I just used glue and nails to attach the boards together.
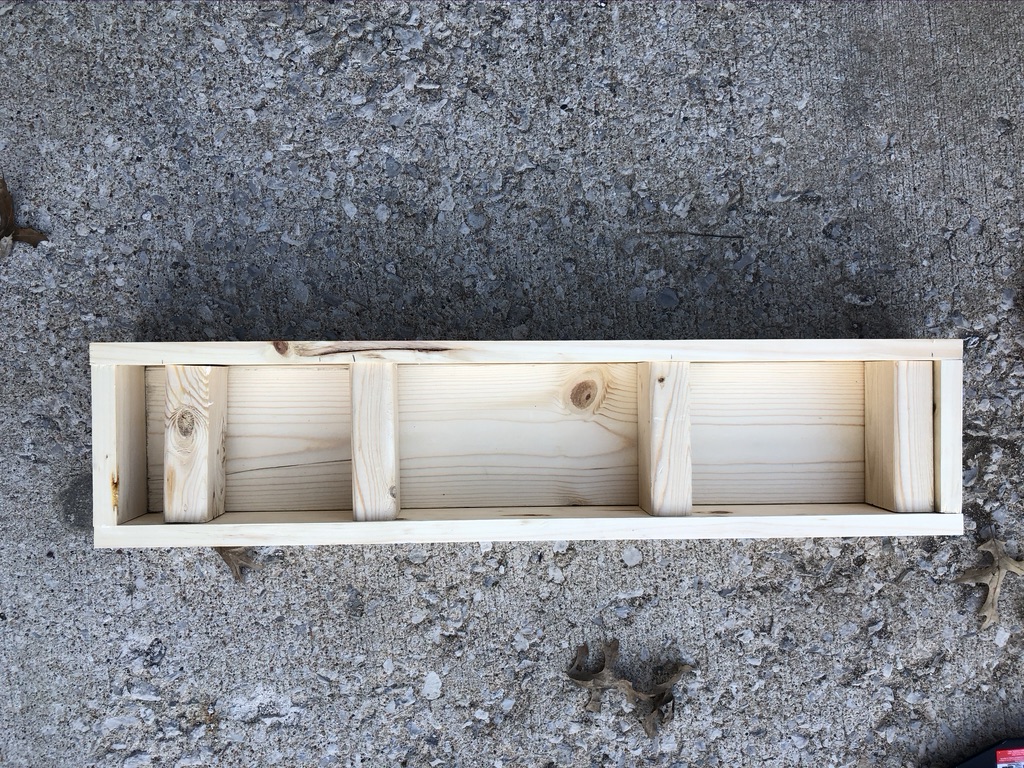
Next, I attached the front and back of the shelf and then used some 2x3s to create supports. Anything that would be visible in the finished product was attached with glue and nails, but I used screws on the back for extra support. I probably over-did it with the supports (my shelf is only 28 inches long), but better safe than sorry, especially when it comes to tenants!
Finally, I cut some 1/4 inch plywood for the underside. I attached this at the very end after hanging the shelves, so this was left off for the staining and finishing.
Also, can you tell the weather was going wild while I built this? Cloudy one second, sunny the next. I thought about fixing the color balance in the photos so it would be cohesive throughout the post, but I kind of want to remember how I built these shelves on my driveway on a wild weather day in March.
Thanks to the weather I didn’t think to take any photos of the sanding or staining process, just some quick videos for Instagram stories. I was fighting the clock to get it done before some dark clouds rolled in. I brought a spare piece of flooring out to pick a stain that is somewhat close, and I ended up applying two coats of Minwax Special Walnut, followed by two coats of satin finish polyurethane. The polyurethane did give the finish a slight yellow color cast, but I think it was worth it. I could have used a different type of sealer, but I wanted to use something that would stand the test of time, especially in an area that’s exposed to moisture and some heat.
As for the hanging process? Well, that was a little difficult, thanks to the fact that I was impatient and hung them alone. The structure of shelf made it pretty easy to hang (in theory), but I was balancing the shelf and a level while changing out drill bits and trying to hit studs all at once. I filmed the process and created a time lapse with it, which you can find in my highlights on my Instagram page. Had I waited for my husband to give me an extra set of hands, I’m sure it would have gone much more smoothly.
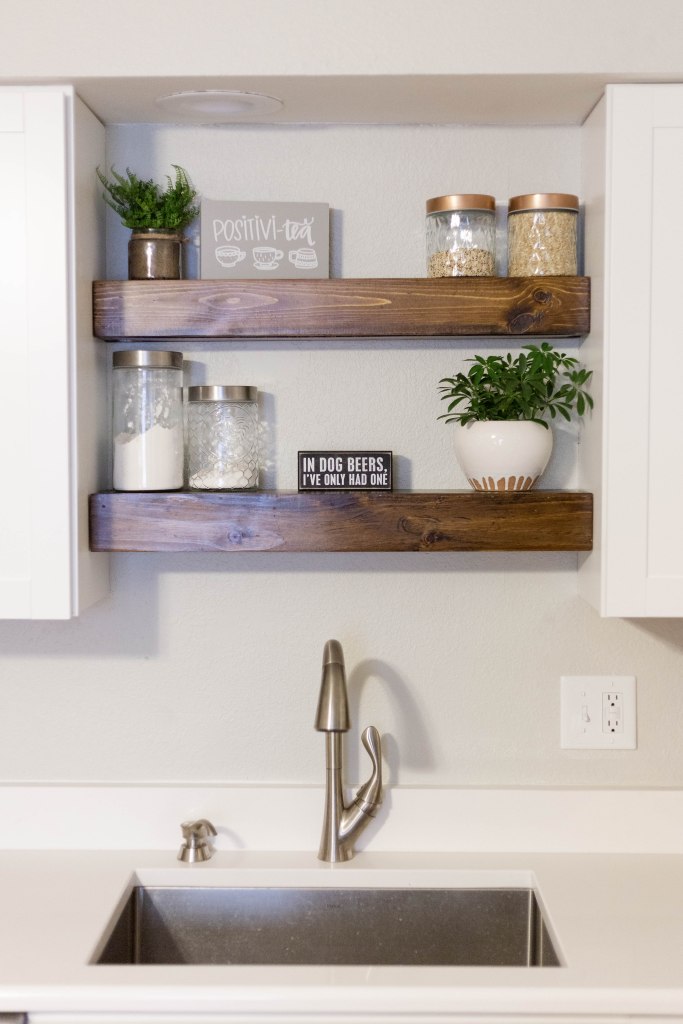
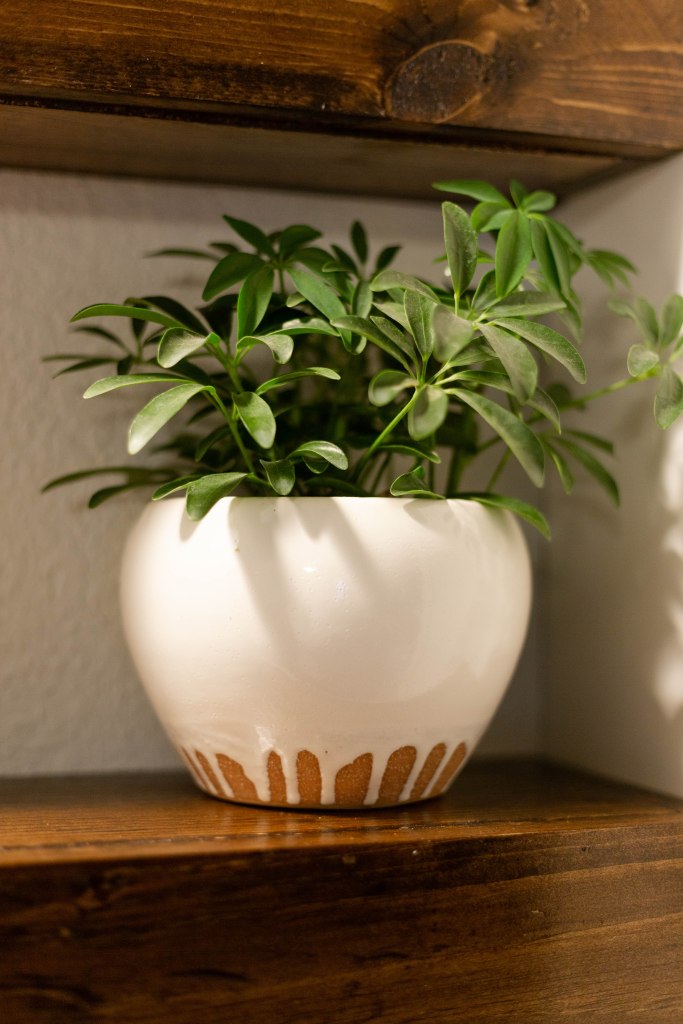
And, of course, the whole reason for the post: the finished product.


One response to “Shelving to Get You Out of a Rut”
[…] also ended up building some floating shelves to fill the negative space above the sink. They’re my favorite part of the […]
LikeLike