“Mantel” is one of those simple words that I am embarrassed to admit I always struggle to spell. Mantel? Mantle? They both look wrong. Anyone else?
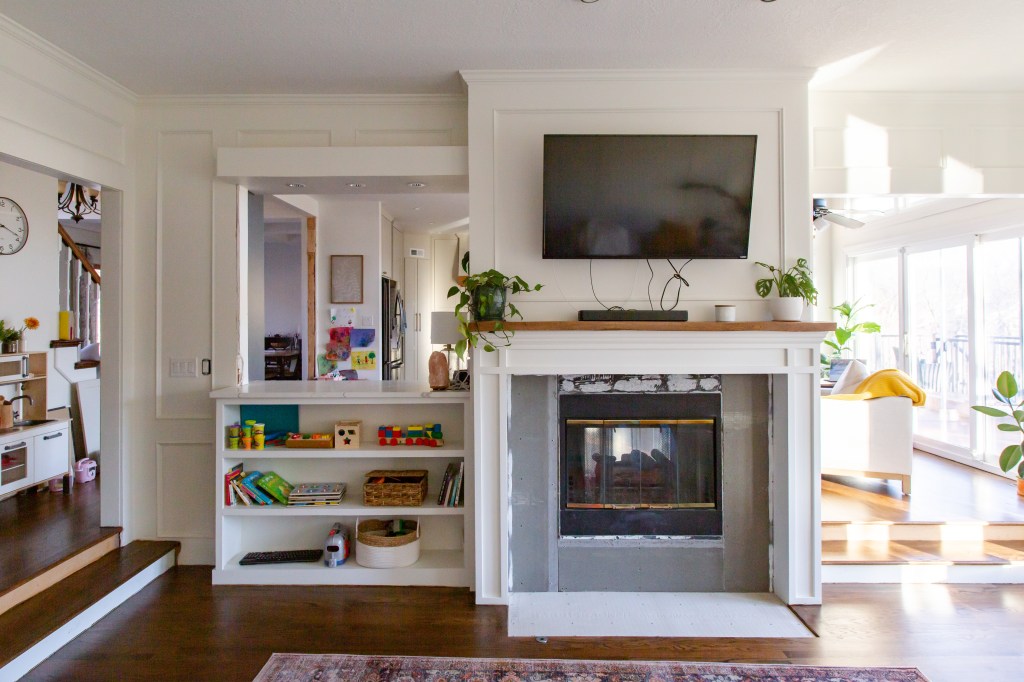
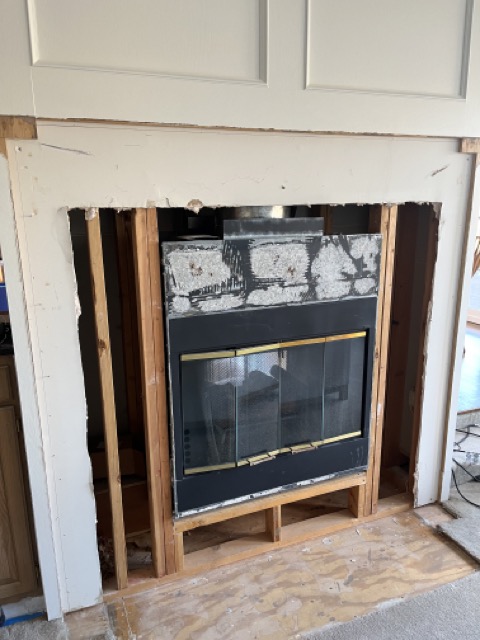
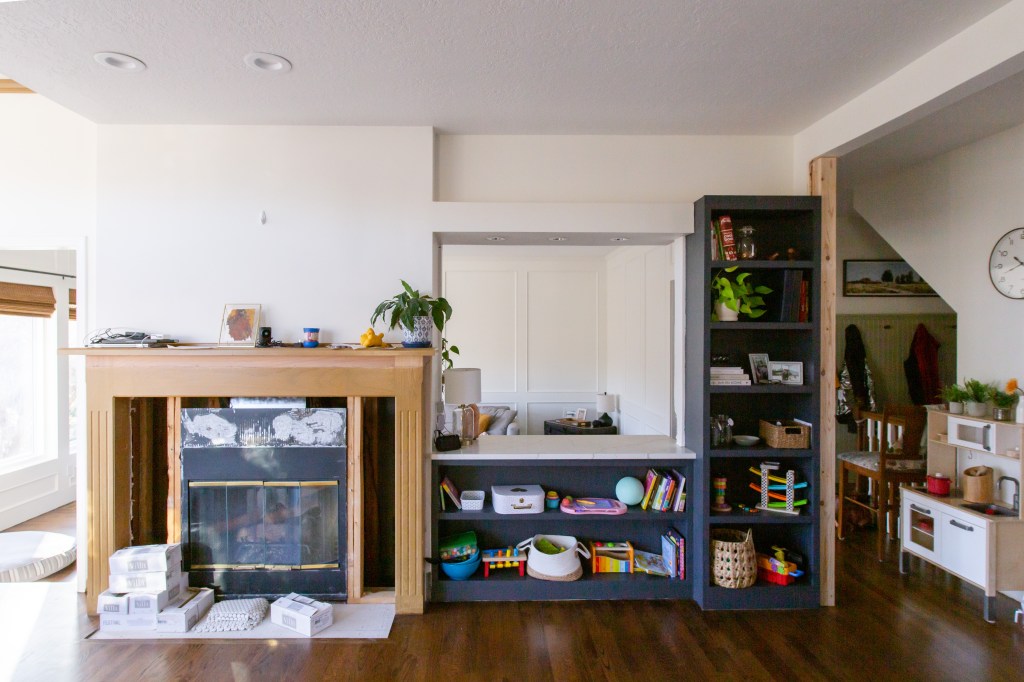
We have a beautiful double-sided gas fireplace between the living room and the kitchen area. It’s fun in that the living room is actually sunken down a few steps, so the dimensions of the mantels on each side vary, but they were designed with the same details so they look cohesive. I don’t hate the style, but I also never loved it. However, I knew I wanted to rebuild the mantels because the living room side was SO TALL that I couldn’t even see the top of it, so I was always losing items up there and dusting was never very effective since I seemed to miss a spot every single time. I wish I had a photo of me standing beside the old mantle for scale. Unfortunately, I decided to tear the whole thing out on a whim one day, thinking that finally taking a step forward with the renovations would help me feel better. Joke’s on me, it’s been seven months and I’m just now getting around to finishing it.
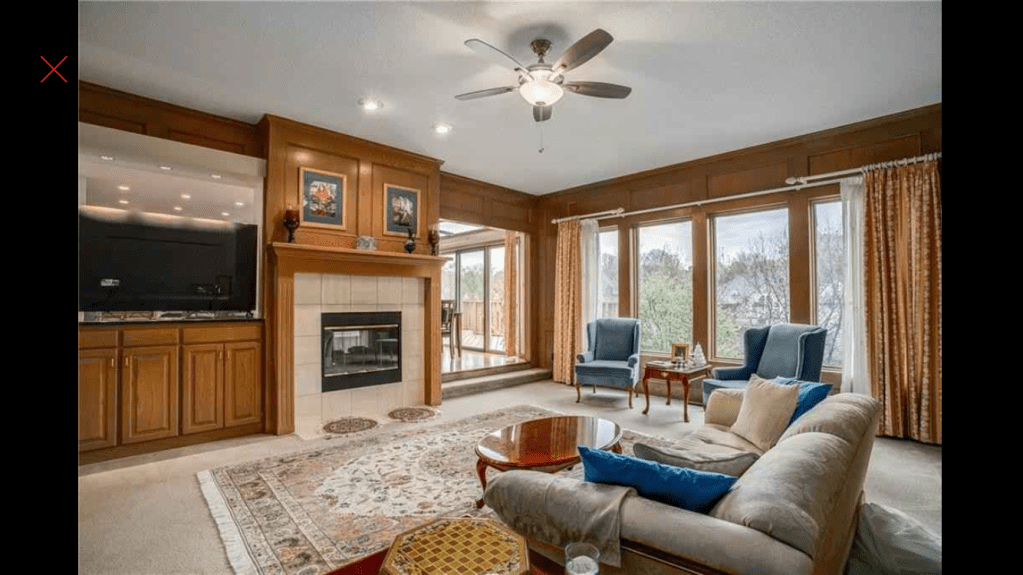
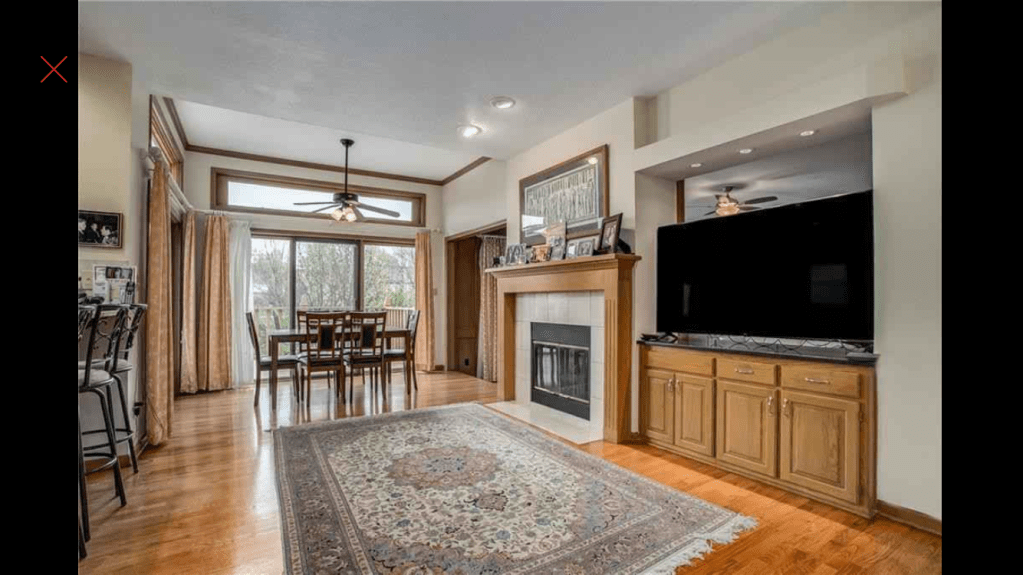
So much has changed since we bought the house – the living room is now a creamy white, the built in bookcases are well on their way to being finished, the floors have been refinished, we’ve swapped out the curtains, and we have new windows that no longer leak.
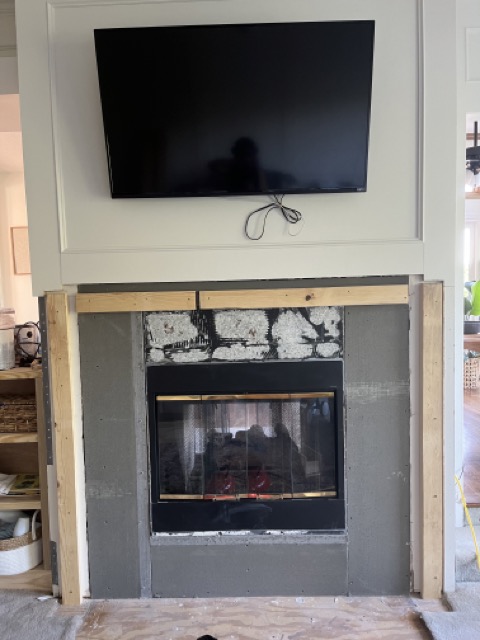
We knew that we wanted to mount our TV above the fireplace so we could orient the furniture to make the fireplace the focal point. The original woodwork had two boxes above the fireplace, which wouldn’t allow us to mount the TV, so we opted to convert that into one box when we rebuilt the mantel. We knew we’d have to redo some of the woodwork when we shortened the mantel in order to make up for the shorter height, so it seemed like the perfect time to turn the two boxes into one. We also decided to run the wiring for the TV behind the woodwork (while making sure we were in code with the gas insert) so we wouldn’t have any exposed wires after we were done.
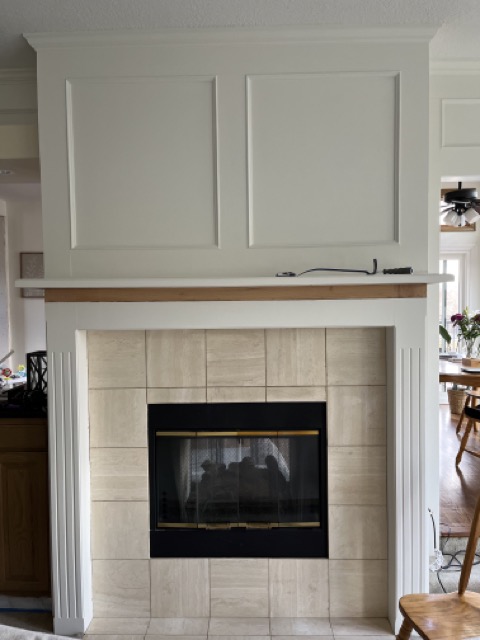
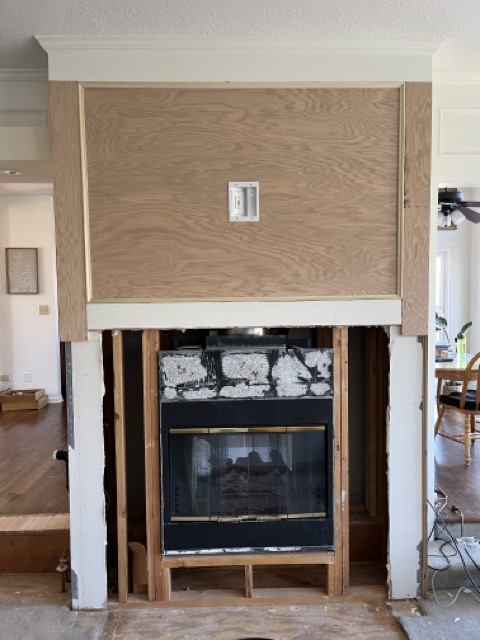
The last picture shows the blocking I used to mount the new mantel to the wall, along with the mounted TV with the single box and the new cement backer board.
I was terrible about taking progress photos while building this one because it was my first time building a mantel and I had very limited time in the sweltering summer evenings after Florence went to bed and before all the neighbors would hate me for making noise too late at night. Here are two photos of the mantel base as seen from the backside (the side that is attached to the wall).
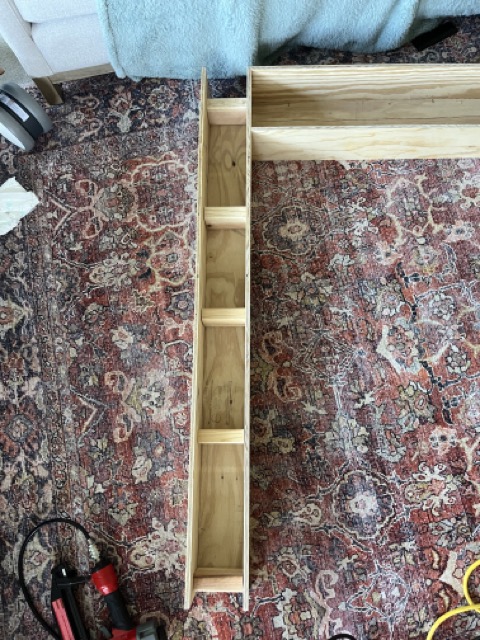
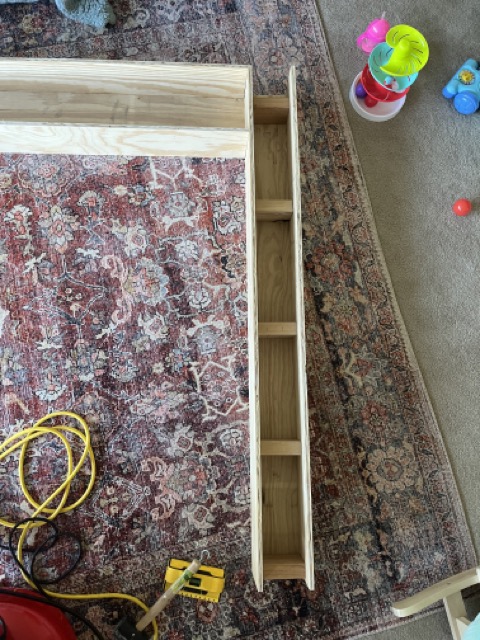
I ended up creating three hollow three-sided boxes, two for the sides and one for the center. I then reinforced these with 2×4 blocks. Finally, I added blocking onto the wall (directly to the studs), then attached the mantle base to that blocking.
The top is made out of white oak; we actually ended up driving out to the middle of nowhere Missouri to pick up the two slabs for the mantels (since I’ll be repeating this on the kitchen side) and only paid $20 a piece for two eight foot, two inch thick sections of dried white oak. We decided to stain them to match the shelving in the kitchen and repeat some elements through the house.
Up next for this project is installing the Old Mill brick and selecting a tile to go on the floor in front of the fireplace. And of course hiding those pesky cords from the TV.


One response to “Creating a Modern Mantel”
[…] one side of which sits in our kitchen area, and the other of which is in our sunken living room (more on rebuilding the mantle here). After the mantel itself was finished, I agonized over what direction to take the tile. I […]
LikeLike