Disclaimer: I lost track of time and definitely wrote this like two months ago, so please enjoy. Also, as an update, my daughter is scared of the sandbox I built, so, y’know, that’s fantastic.
I have this terrible habit of being really cheap, which means that I just can’t justify spending money on something I could make myself, even if making it myself costs almost the same amount in materials, plus lots of time making the thing I’m trying to save money on. Since I don’t have a lot of time with a very needy 11 month old crawling around, all the projects tend to pile up and then I get frustrated that every single space in my house is currently a half demo’ed disaster zone… although perhaps that’s how it’ll always feel, since I’m a firm believer that a house has to evolve into a home over time. (Maybe I have that belief because it’s true, maybe I have that belief because I have analysis paralysis and spend three years trying to pick curtains because I’m terrified to pick “wrong”. Which is it? I’ll never tell.) Anyway, the entire premise is ironic for someone who is married into the military and doesn’t really have the luxury of waiting for that evolution to occur, no? Nonetheless, this is where I find myself, once again lost in my rambling thoughts as I try to finish the cuts for the sandbox I’ve decided to build my daughter while running out of daylight on an early June evening because I’m just. too. dang. cheap. to buy one that’s already built for me.
I’ve known for a while that I wanted to put a sandbox on the upper portion of our deck, and now that we’ve had the deck rebuilt so children can no longer fall out between the balusters of the railing or through the open stairs, I felt safe enough to start looking at options. I started running into problems when I saw all the pre-built options, though, since I’m working with a somewhat limited amount of space. Our deck is quite large, but I also want a place to sit and relax outside while our little one putters in the sand, so many of the pre-fab options were just too big and square. Plus, did I mention I’m cheap? The sticker shock on some of those was rough, especially since I knew I could build a bespoke sandbox out of cedar, a rot resistant wood, for much less.

Enter in the plans by “Lady Goats”, featured on Ana White’s website. The measurements in the original plans still led to a nearly square sandbox, so I decided to build just half of a sandbox. Instead of two benches, one. Instead of a square, a rectangle. It would fit my space better, would be enough for the little one to play in for the near future, and would cost less too, which was perfect for my budget.
The other issue is that the original plans don’t call for a bottom, which makes sense if you are putting it in the grass or on a concrete patio… not so much the case when you’re on the top floor of a two story deck and the bottom floor isn’t weather proofed. Although, maybe some sand periodically raining down on you through the cracks could help you pretend you were on the shores of somewhere scenic instead of in the smack dab middle of the USA.
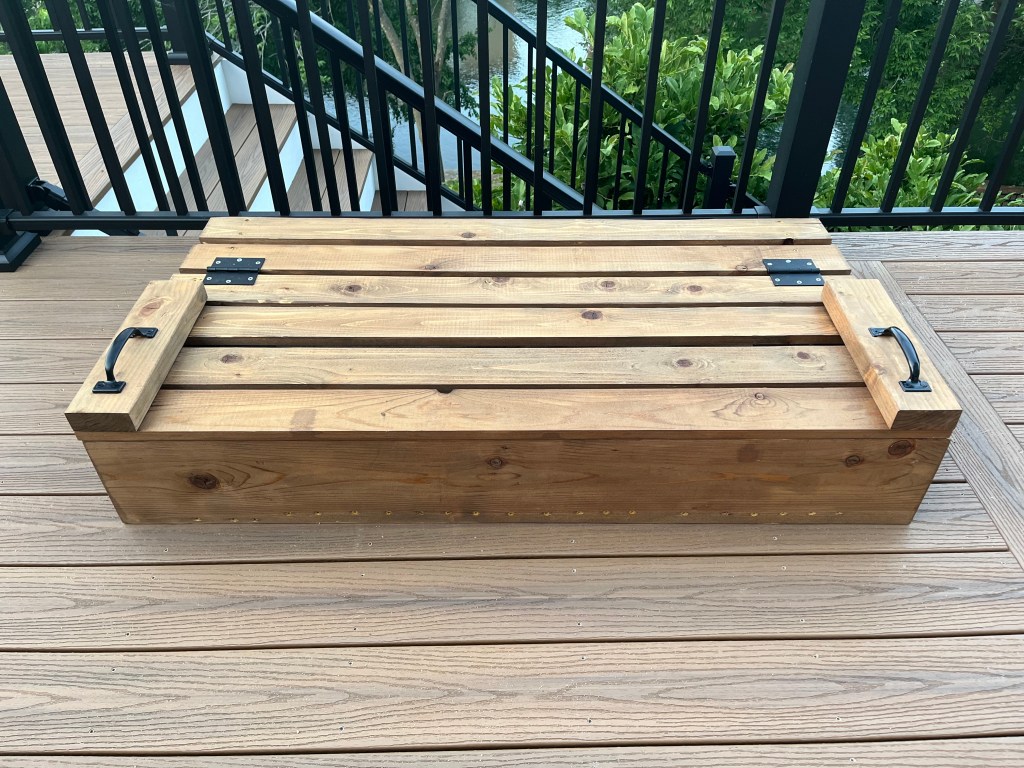
In order to add a bottom, I opted for 2×6 treated pine. It was cheaper than using cedar, which I used for the rest of the structure and it would hold up to the elements. I chose to use cedar for the rest of the structure since all those pieces would be touched by little hands, and I didn’t like the idea of my daughter touching the chemically treated lumber and then possibly putting her hands in her mouth or having the chemicals potentially absorb into her skin. The bottom of the structure is only accessible if you flip the entire sandbox over, since it sits recessed into the cedar frame and is covered on the inside of the sandbox with three layers of landscaping fabric to prevent the sand from leaking out, so I felt comfortable using the treated lumber for the bottom.
Once I got it all cut, sanded, and assembled, I decided to stain it using Special Walnut by Minwax. This helps give the wood an extra bit of protection from the elements and helps it all look a bit more uniform.
Here’s how it all turned out! I can’t wait to build some sofa furniture so I can sit outside and enjoy the view while she plays.