
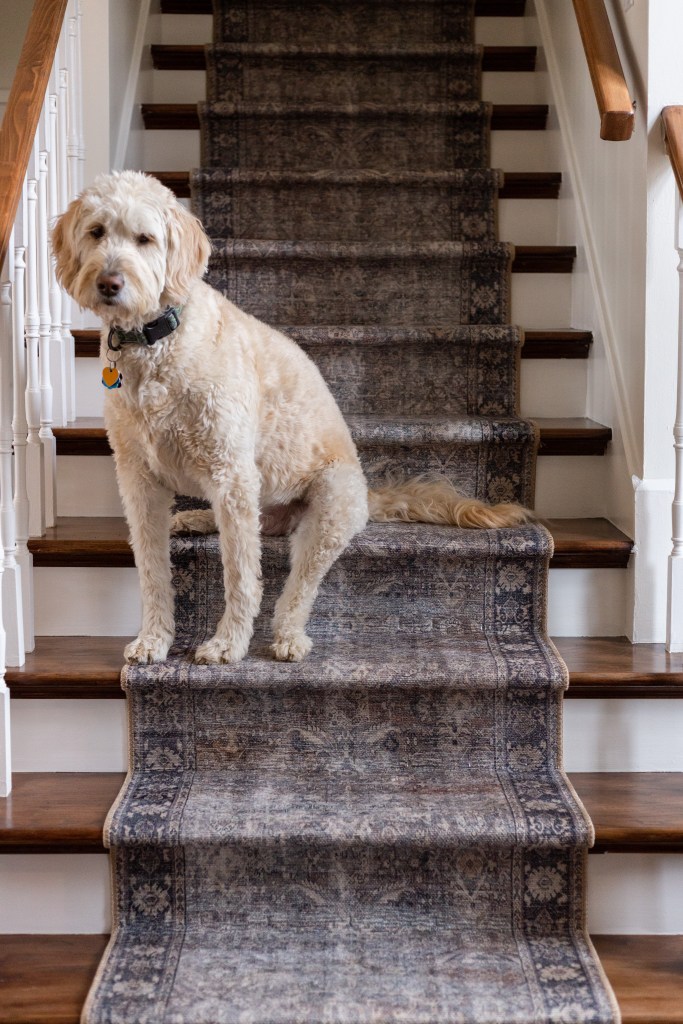
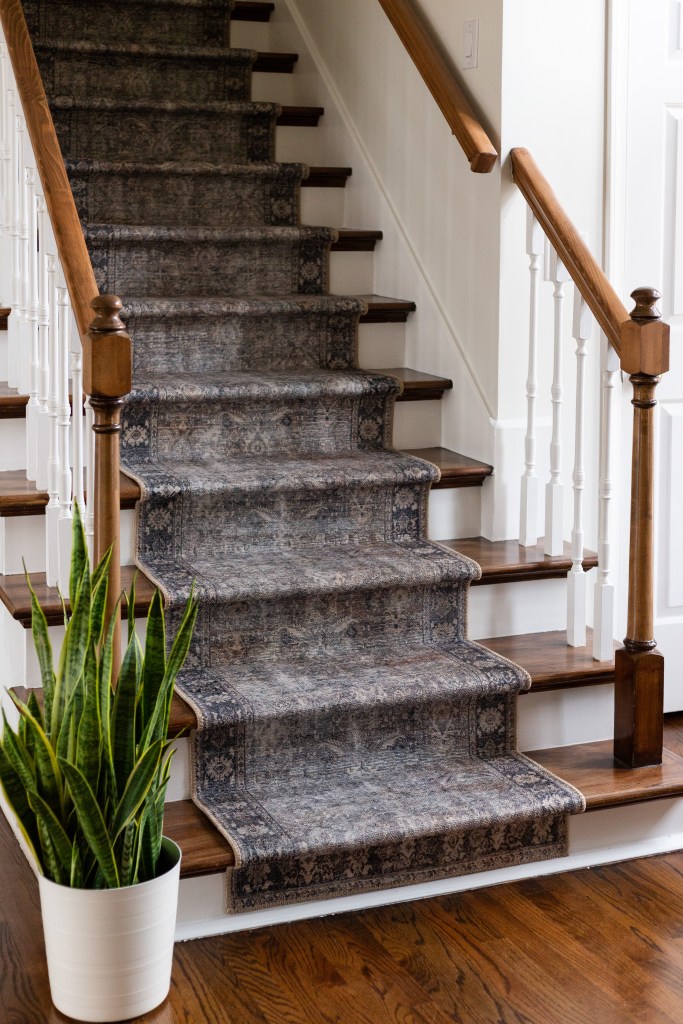
Our stairs are made of beautiful hardwood treads, but they’re also steep and slippery, so I’ve spent the last 20 months dreading every trip up and down them, especially since we have a temperamental handrail that likes to wiggle from time to time (it’s on the list). Enter the stair runner, which is actually four separate runners, thanks to the now all-too-familiar pandemic induced supply chain woes that are wrecking every industry.
The first step of this transformation was repainting the risers and skirting boards. The previous owner had all the trim, doors, and vanities painted white in an attempt to make the house look more modern, but never used any primer on the original stained wood, so the paint was streaky and chipping away. I sanded it all down, applied a primer, sanded that, recaulked all the cracked corners, and finally repainted it the same shade of white semigloss I’ve used through the rest of the house. Eventually I’ll replace the trim in the house, but I knew I’d be leaving the stair risers and skirting boards, so it was especially important that this paint stuck and looked nice.
Next it was FINALLY time to install the runner! It was actually a pretty easy process, just time consuming.


Supplies:
- Double sided rug tape (I used this one)
- Rug pad (linked here)
- Runner (linked here)
- Staples
- Pneumatic staple gun
- Scrap wood for guides
- Metal putty knife or carpet tool
- Box cutter to cut runner
1. Create Wooden Guides
First I created two guides out of scrap wood, one for each side, to help me keep the runner as even and straight as possible while I installed it. To find the size of the guides I did a simple calculation.
(Width of stair – width of rug)/2 = width of guide piece
2. Install Rug Pads
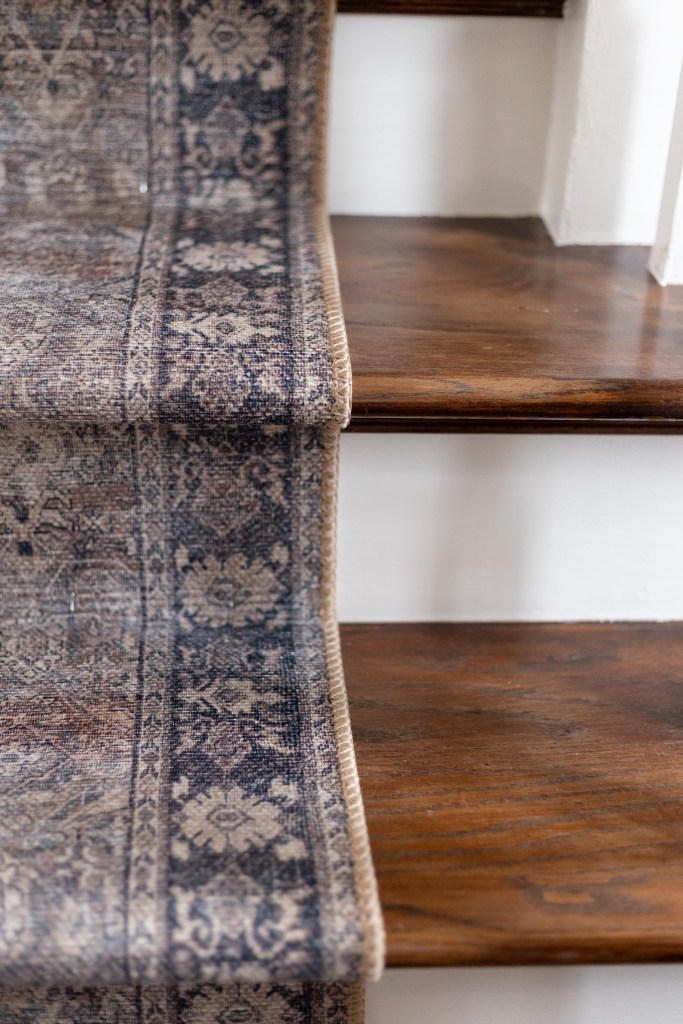
To save money, I bought a 5’x7′ rug pad and cut a piece for each tread. My goal was to give the rug something to grip to and to give a bit more cushion under the runner. I cut each piece a bit smaller than the runner width because I didn’t want it to show if you saw the runner from the side.
I started by putting the double sided carpet tape on the pads. DON’T do this. It was so much harder this way because that tape is so sticky! Instead, I put the tape directly on the stair, as shown in the photo below.

3. Place Double-Sided Carpet Tape on Rug Pads
After each rug pad was installed, I used the leftover tape to put a few pieces on top of each rug pad. This served a two purposes:
1. It covered up the sticky tape that was showing through the holes in the rug pads because it was a few days between installing the rug pads and when I could install the runner (our socks kept getting stuck).
2. It would hold the runner a bit more securely to the tread since I didn’t plan to use staples on the treads (I didn’t want to put holes into the treads incase I ever want to remove the runner).
4. Install the Runner
I chose to keep the border at the very top of the stairs and the very bottom, so I just went ahead and started the first piece on the very top riser, trying to keep it as straight as possible. I kept my guide blocks on each side of the runner on the tread to make sure it was even from side to side. I had planned to only put staples into the top of the riser and bottom of the riser, but because there is a decorative trim piece at the top of each riser on our stairs I didn’t get the amount of grip I was looking for. Instead I ended up stapling into the underside of the nose of the tread, the decorative trim piece, and into the bottom of the riser.
I used an angled metal putty knife I had on hand to push the runner into the corners as tightly as possible. This helped keep everything straight.
I always tried to work top down because it was so much easier. I didn’t have much option at the bottom of the stairs because I’m an overachiever and knew I wanted to end with the border of the runner, so I had to work my way up to meet the last runner I had installed.
Notes:
- When joining two rugs, I found it was easiest to starts the next one and then once I had secured two or three stairs worth of runner I came back up and tacked the original one on top of the new runner. I always joined them together under a tread so it is harder to see where the seams are.
- I wanted to use crown staples because they’re thinner and would be harder to see, but I couldn’t find any that would work with my stapler, so I made regular heavy duty staples work.
- Less is more! I installed staples every 4 inches, then went back and added more where necessary. I didn’t want to put unnecesarry holes into the stairs in case I ended up wanting to remove the runner, but I wanted it to be extra secure.
- My runner was a synthetic blend material and I found it helpful to use a long lighter to lightly melt the edges after I cut the runner. This just keeps it from fraying as much.
